Many of us need to consider it before we create or maintain lawns in our gardens. Could these seemingly harmless patches of greenery actually be a massive waste of space? This realization is a crucial step in our journey toward a more sustainable future. Private residential lawns symbolize the intersection between environmental awareness and anti-capitalist values. Rethinking how we use this space is an essential step in adapting to climate change and thinking outside the box. It’s time to rethink our approach to landscaping, make a change, and understand why native plants are the sustainable alternative to traditional lawns for homeowners in Annapolis.

At Paradise Landscapes and Hardscapes, we advocate reimagining the role of lawns in our outdoor spaces. While they’ve long been cherished as a hallmark of suburban charm and property pride, traditional residential lawns are beginning to reveal their hidden costs—both environmentally and socially. The excessive water, fertilizers, and maintenance they demand not only pose a financial burden but also strain our natural resources and contribute to pollution, underscoring the urgent need for sustainable alternatives.

Why Native Plants Are the Sustainable Alternative to Traditional Lawns


For today’s eco-conscious homeowners, lawns are becoming less of a symbol of pride and more of a reminder of the resources they consume. However, at Paradise Landscapes and Hardscapes, we see an exciting opportunity. We can transform these spaces into vibrant, sustainable landscapes that not only reflect beauty and purpose but also contribute to a healthier planet. By replacing traditional lawns with native plants and eco-friendly landscaping practices, we can turn your yard into a thriving ecosystem that supports local wildlife and inspires a greener future.

Whether you’re creating pollinator-friendly gardens, incorporating native plants, or designing multifunctional outdoor spaces, we’re here to help you turn your yard into a meaningful part of the climate solution. Every square foot of your landscape can lead toward a greener future. Your choices and actions matter. Let’s grow something better together and significantly contribute to combating climate change. 

Environmental Concerns


Water Consumption

Lawns are notorious water guzzlers. In the United States, about a third of all public water is used to water grass, amounting to nearly 9 billion gallons of water per day. This excessive water use is particularly concerning in drought-prone areas.

Emissions and Pollution

Maintaining lawns contributes to greenhouse gas emissions in several ways:

  • Gas-powered lawnmowers produce significant emissions, with one hour of mowing generating as much pollution as driving a car for 11 hours.
  • The production and use of nitrogen-based fertilizers release carbon into the atmosphere and can lead to the formation of nitrous oxide, a potent greenhouse gas.
  • Pesticides and herbicides used on lawns can contaminate waterways and harm wildlife.

Biodiversity Loss

We see lawns for what they are—monocultures that fail to support our planet’s intricate web of life. Unlike vibrant ecosystems or gardens brimming with diverse native plants, traditional lawns offer minimal habitat for wildlife and do little to encourage biodiversity.

But your outdoor space can be so much more. By replacing turf with native plants, wildflower meadows, or pollinator gardens, you can transform your yard into a thriving ecosystem teeming with life. Your choice to promote biodiversity in your own yard is a significant step towards a healthier, more sustainable world, empowering homeowners to make a positive impact.

Imagine a space alive with the hum of bees, the flutter of butterflies, and the rustle of birds—every corner contributing to a healthier, more sustainable world. If you want to learn more, don’t hesitate to reach out. We can turn your landscape into a sanctuary that enhances your property and gives back to nature. Let’s create a space that’s as dynamic and diverse as the life it nurtures.


Cultural and Historical Context

The tradition of manicured lawns has deep roots in Western culture. It originated from British aristocracy and evolved into a symbol of suburban affluence in America. This cultural legacy has led to the widespread adoption of lawns, often without consideration of their environmental impact.

Alternatives and Solutions


Native Landscaping

Replacing traditional lawns with native plants can:

  • Reduce water consumption and maintenance needs
  • Promote biodiversity and support local ecosystems
  • Provide year-round visual interest

Sustainable Lawn Practices

For those who prefer to keep some lawn space, more sustainable approaches include:

  • Reducing lawn size
  • Using drought-tolerant grass species
  • Minimizing chemical inputs
  • Employing manual or electric lawn care equipment

Rethinking Green Spaces

Reassessing the purpose and design of our outdoor spaces can lead to more environmentally friendly and functional landscapes. This might include:

  • Creating food gardens
  • Establishing pollinator-friendly habitats
  • Incorporating permeable surfaces to reduce runoff

While beautiful, lush green lawns have been a staple of American landscaping for generations, their environmental cost is becoming increasingly evident. As we face climate change and biodiversity loss, rethinking our approach to garden spaces is not just advisable but necessary. By embracing more diverse, native, and sustainable landscaping practices, we can transform our yards from ecological burdens into thriving, beneficial ecosystems.

Manicured lawns may look beautiful but have a significant environmental cost. In many climates, maintaining a lush, green lawn often requires chemical fertilizers, pesticides, and excessive watering—using up to 1.5 billion cubic meters (329 billion gallons) of municipal water every summer day. On top of that, gas-powered lawnmowers contribute to air pollution, adding to the environmental impact. Despite these issues, most environmental legislation focuses on agricultural land, leaving residential lawn care largely unregulated. If you’re concerned about eco-friendly lawn care or sustainable landscaping, it’s worth considering alternatives to traditional grass lawns.

What are the environmental benefits of replacing lawns with native plants?


Urbanization has drastically reshaped the landscape, replacing ecologically rich habitats with lawns and ornamental plants. In the United States alone, urban sprawl has claimed 150 million acres of habitat and farmland, and the trend continues to grow. Lawns, a symbol of the ‘perfect yard,’ now cover over 40 million acres nationwide, creating a monoculture offering little to no wildlife benefits. This human-driven transformation has fragmented ecosystems, leaving natural areas too small and disconnected to support healthy wildlife populations. It’s time to rethink our approach to landscaping and promote sustainable ecosystems. Contact us to learn more about how urban sprawl and traditional landscaping practices impact the environment and what can be done to make a change.

Native plants occur naturally in the region in which they evolved. They are the backbone of life, supporting everything from the birds in our skies to the people in our communities. Without them—and the insects that have evolved alongside them—local bird populations simply cannot thrive.

For example, research by a leading entomologist reveals that native oak trees provide food for over 500 species of caterpillars. In contrast, the ginkgo, a popular Asian landscape tree, supports just five. That might only seem like a big deal once it takes over 6,000 caterpillars to raise a single brood of chickadees. The difference is staggering.

By choosing native plants for your landscape, you’re not just planting a tree or a shrub—you’re creating a lifeline for wildlife and helping to restore the delicate balance of our ecosystems. It’s a simple choice that makes a powerful impact.

Why Native Plants Matter. Restoring native plant habitats is more than a trend—it’s a critical step toward preserving biodiversity and protecting the natural world we all share. When you create a native plant garden, your yard becomes part of a more significant, collective global effort to nurture and sustain the living landscape for birds, pollinators, and countless other creatures.

Swapping out traditional lawns for native plants isn’t just good for wildlife—it’s great for the environment, too. Your yard can become a thriving, sustainable, eco-friendly oasis that makes a real difference. Here’s why it matters:

  • Boosts Biodiversity: Native plants provide food and shelter for local wildlife, supporting a wide variety of species that lawns simply can’t
  • Saves Resources: Native gardens typically require less water, fertilizer, and maintenance, making them both beautiful and efficient.
  • Fights Climate Change: These plants naturally store more carbon in the soil and reduce the need for energy-intensive lawn care.

Transforming your outdoor space isn’t just a choice—it’s a way to give back to the planet while creating a stunning, low-maintenance landscape you’ll love. Together, let’s grow something extraordinary.

Other Environmental Benefits of Native Plants


Water Conservation

Native plants are a water-saving solution for homeowners looking to create sustainable landscaping. Unlike traditional lawns, native plants naturally adapt to the local climate, meaning they need far less water to thrive. By incorporating drought-tolerant native plants into your yard, you can significantly reduce residential water consumption, which makes up nearly one-third of all water used for landscaping. Switch to native landscaping and save water while supporting the environment!


Reduced Chemical Use

Native plants are the perfect eco-friendly choice for your yard because they grow naturally without using fertilizers, pesticides, or herbicides. By choosing native landscaping, you can reduce chemical use, prevent harmful runoff into waterways, protect aquatic ecosystems, and help fight pollution. Create a sustainable and beautiful outdoor space with native plants today!


Carbon Sequestration

Native plants with deep root systems are excellent for carbon storage, making them a powerful tool in fighting climate change. Unlike shallow-rooted turf grass, native plants store more carbon in the soil, helping to reduce carbon dioxide levels in the atmosphere. By planting native species, you can improve soil health, support local ecosystems, and contribute to a more sustainable environment.


Improved Air Quality

Native plant landscaping is an eco-friendly solution that helps reduce air pollution and lower greenhouse gas emissions. By eliminating the need for gas-powered lawn equipment, native plants create a sustainable and low-maintenance outdoor environment. Plus, native plants naturally absorb carbon dioxide from the air and store it long-term, making them a powerful tool for fighting climate change. Embrace native plant gardening to promote clean air, reduce your carbon footprint, and support a healthier planet.


Enhanced Biodiversity

Native plants are essential for creating habitats and food sources for pollinators such as bees, butterflies, and birds. By planting native species, you also support local wildlife and help maintain ecological balance. Unlike traditional lawns, which provide little to no habitat value, native plants improve biodiversity and contribute to a healthier environment. Add native plants to your garden to attract pollinators and make a positive impact on local ecosystems!


Erosion Control and Water Quality

Native plants with deep roots help prevent soil erosion, improve water absorption, and filter pollutants from stormwater runoff. By protecting local waterways and reducing the risk of flooding, native landscaping promotes a healthier environment. Optimize your garden or outdoor space with native plants to support sustainable water management and prevent pollution.


Climate Resilience

Native plants are the best choice for sustainable landscaping because they are naturally adapted to handle extreme weather like droughts and heat waves. Unlike traditional lawns, native plants are more resilient to the effects of climate change, making them an eco-friendly and low-maintenance option for your yard.

Homeowners in Annapolis are starting to replace traditional lawns with native plants, and the benefits are clear. Switching to native vegetation reduces maintenance costs and creates a healthier environment and a more vibrant, sustainable landscape.


The obsession with traditional green lawns has become a global trend, spreading to regions where they don’t naturally belong. From desert climates to urban areas, perfectly manicured lawns require excessive water, chemicals, and maintenance to stay lush and green. Even in countries like China, with no historical connection to lawns, they’ve become a popular landscaping choice, driven by global trends and aesthetics. This widespread adoption of lawns has led to a disconnect between landscaping practices and environmental sustainability.

By choosing native plants over traditional grass lawns, communities like Annapolis can promote eco-friendly landscaping, conserve water, and reduce the need for chemical fertilizers and pesticides—helping both the planet and homeowners’ wallets.

Statistics show just how widespread lawns have become. Globally, lawns now comprise 70-75% of all urban green spaces, covering 23% of the world’s urban land area. In the U.S. alone, lawns occupy six times more land than corn, the country’s largest irrigated crop. Yet, maintaining these lawns comes at a cost—many of us spend hours each weekend mowing and watering to keep them pristine.

Pursuing a perfect green yard has even fueled the booming artificial turf market, now worth $2.6 billion. Made from polypropylene fiber or recycled rubber, artificial grass is gaining popularity in backyards, professional sports fields, and public spaces, offering an alternative to traditional grass lawns.

As climate change pushes us to rethink sustainability, it’s worth questioning our attachment to lawns. Are they necessary, or is it time to explore more eco-friendly landscaping options?

The Environmental Impact of Lawns: Why It’s Time to Rethink Traditional Grass Lawns


Perfectly manicured lawns have been status symbols for centuries. Lawns have long been a symbol of beauty and status, but their environmental cost is becoming harder to ignore. According to a 2018 study by Maria Ignatieva, professor of landscape architecture at the University of Western Australia, the environmental harm caused by traditional grass lawns outweighs their benefits. Ignatieva advocates for eco-friendly alternatives, such as low-maintenance lawns featuring native, drought-resistant plants and modern ground covers. These options, including meadow lawns and grass-free yards, are gaining popularity in countries like Sweden and are being studied in projects like the Lawn As A Living Lab in Perth.


Water Usage: A Growing Concern

In arid regions like California, lawns are a major water consumer, using up an estimated 40-60% of domestic water supplies. This heavy water usage has led to initiatives encouraging homeowners to replace traditional grass. Programs like the California Turf Replacement Rebate Program offer residents up to $2 per square foot of removed turf, with subsidies available for installing artificial grass or drought-tolerant landscaping.


Eco-Friendly Alternatives to Traditional Lawns

Many homeowners are now shifting to sustainable lawn alternatives and approaches, such as transforming yards into natural habitats that attract bees and essential pollinators. These eco-friendly gardens not only reduce water consumption but also support biodiversity.

Even the golf industry, often criticized for its reliance on pristine, heavily watered courses, is adopting greener practices. For example, many golf courses are transitioning to biological management and allowing nature to shape the landscape. This shift reduces chemical use and lowers maintenance costs over time.

Changing Lawn Culture

Our perception of lawns is slowly evolving. Historically, lawns were purely ornamental and costly to maintain. Today, the focus is shifting toward functionality, sustainability, and water efficiency. However, changing attitudes takes time, as many people still associate manicured lawns with quality and prestige.

In the case of golf, for example, television has driven unrealistic expectations, with golfers expecting every course to mimic the flawless perfection of Augusta National. While some resistance remains, courses are beginning to lead the way, adopting sustainable practices that benefit both the environment and their bottom line.

Why Sustainable Lawns Matter

As droughts and water shortages become more common, the need for sustainable landscaping solutions has never been greater. From replacing grass with native plants to embracing eco-friendly lawn care methods, there are countless ways to reduce the environmental impact of our outdoor spaces. By rethinking the traditional lawn, homeowners, businesses, and industries alike can contribute to a greener, more sustainable future.

If you’re looking for ways to make your lawn more eco-friendly, consider switching to drought-resistant plants, exploring artificial turf, or re-wilding your space to support pollinators. Every step counts in reducing water use and protecting our planet.

Are lawns really all bad?  

While traditional grass lawns often face criticism for their environmental impact, they also offer surprising benefits. Lawns can provide habitats for various species and support essential soil organisms. They help cool urban areas by transpiring and evaporating water, reducing the heat island effect in cities. Plus, lawns are great for rainwater management. Research shows that only 5-15% of rainwater on lawns becomes surface runoff, compared to 60% in urban areas without grass. (Learn more about why environmental groups suggest letting lawns go unmown.)  

The history of lawns dates back to the 13th century in the West, but today, lawns are a global phenomenon. Recent studies have highlighted that lawns can act as carbon sinks, helping reduce CO2 in the atmosphere. However, this depends on maintenance. Lawns fertilized frequently can emit more carbon than they store, and their soil may eventually reach a saturation point where they no longer sequester carbon efficiently. Letting grass grow longer or transforming lawns into wild grasslands can improve their carbon storage capabilities.  

Interestingly, a 2018 University of California Davis study found that wild grasslands are more reliable carbon sinks than forests in certain areas, like California. While garden grasslands are different from wild ones, and forests provide other crucial benefits, like diverse wildlife habitats, this research highlights the potential of grasslands in combating climate change.  

Homeowners can unlock ecological benefits by reconsidering how lawns are managed and allowing for more natural growth. Whether you’re considering reducing lawn mowing, creating a wild garden space, or exploring alternatives to traditional lawns, your choices can positively impact biodiversity, urban cooling, and carbon storage.


Are Perfect Green Lawns Sustainable? Rethinking Lawn Care and Maintenance  

Golf course lawns have long influenced the obsession with achieving the perfect green carpet in homes and public spaces. But is this ideal sustainable? David Hedges-Gower, chairman of the Lawn Association, raises an important question: Can we move away from this traditional aesthetic after centuries of lawn culture and decades of lawns as a mass-market consumer product?  

Without consistent watering and pesticides, the classic lush green lawn works well in some climates but is unrealistic in others. This brings up the need for sustainable lawn alternatives. However, skeptics argue that most alternatives face practical challenges. Many require specific expertise to maintain or need to be more durable for functional use like walking, playing, or leisure activities. For many, a lawn’s purpose goes beyond aesthetics; it’s also a space for recreation.  

Another consideration is the simplicity of lawn maintenance versus gardening. This is why city planners and local governments often favor lawns for public spaces—they’re inexpensive, low-maintenance, and don’t require special skills.  

Most homeowners prioritize aesthetics over environmental sustainability when managing their lawns. As discussions about eco-friendly lawn care grow, the question remains: Are we ready to embrace alternatives that balance form, function, and the environment? WWe’dlove to hear your thoughts.


Contact Paradise Landscapes and Hardscapes in Annapolis, MD, for all your garden and lawn care needs. Let us help you create a sustainable and beautiful outdoor space.


Citations:

[1] https://www.thecommons.earth/blog/the-environmental-impact-of-grass-lawns-why-its-time-for-a-change

[2] https://www.reddit.com/r/AskAnAmerican/comments/1h15eau/why_do_so_many_gardens_in_the_us_seem_to_be_just/

[3] https://ggwash.org/view/83168/lawns-may-be-green-but-theyre-terrible-for-the-environment

[4] https://www.bbc.com/future/article/20220426-should-people-get-rid-of-their-garden-lawns

[5] https://kogod.american.edu/news/grass-lawns-are-burning-your-pockets-our-planet

[6] https://blog.nwf.org/2024/04/why-we-have-lawns/

[7] https://psci.princeton.edu/tips/2020/5/11/law-maintenance-and-climate-change

[8] https://www.hecweb.org/2024/04/05/the-environmental-impact-of-lawns-and-invasive-species-a-look-inside-the-movement-towards-native-landscapes/

[9] https://www.discovermagazine.com/environment/your-perfect-lawn-is-bad-for-the-environment-heres-what-to-do-instead

Deer can cause a lot of damage to your yard and landscape – especially in the fall. Deer control is one of the most popular and frequently requested services at Paradise Landscaping & Hardscapes. We can help reduce the presence of deer in and around the edges of your property. But how do you know that you’ll need our services in the first place? Deer are pretty active in the fall. They leave behind traces of damage that may be confused with pest-animal damage at times. In any case, it’s better to be safe than sorry! The following are some common signs of deer damage in your yard.

You use ornamental plants to improve the look of your lawn, garden, and landscaping. Unfortunately, they are a significant food source for deer. Because they consume the buds, leaves, and stems, this depletes the plants of what they require to live. Deers hang out in farms, orchards, nurseries, and residential neighborhoods. When the lower branches of trees begin to disappear, deer are likely in the area.

Recognizing signs of deer damage in your yard is crucial for maintaining the health of your plants and landscaping. Here are the common indicators to look out for.

Common Signs of Deer Damage


  • Browsing Damage: Deer typically leave behind torn or ragged edges on leaves, stems, and flowers. Unlike rabbits, who nibble cleanly, deer tear plants due to their lack of upper incisors. This results in a rough appearance where leaves and stems have been eaten, often leaving only stubs behind
.
  • Trampled Plants: One of the most obvious signs is a trampled yard in some areas. You can easily look for signs of trampled vegetation around the areas where deer have fed. Their hooves can smash nearby plants, creating noticeable disturbances in the soil and foliage
.
  • Antler Rubbing: Male deer (bucks) often rub their antlers against trees, especially during the rutting season. This behavior can cause vertical scrapes and shredded bark, exposing the wood underneath. This type of damage is particularly harmful to young trees
.
  • Deer Droppings: Finding deer scat resembling larger rabbit droppings (elongated pellets) can indicate recent deer activity. The droppings are often found near feeding areas
.
  • Tracks: Deer tracks are distinctive, shaped like two halves of a broken heart, and measuring about 2-3 inches long. They can be found in soft soil or mud and may indicate deer frequently use paths.
  • Height of Damage: Deer can reach about 6 feet high, so you may notice that new growth on taller plants is missing or has been “tipped” off
.

Preventive Measures

To mitigate deer damage, consider planting less appealing species or using protective measures such as fencing or repellents. While various sprays and home remedies exist, they are often minimally effective against determined deer populations.

Flowering Perennials

These plants provide beauty while deterring deer:

  • Chrysanthemums: Bright and vibrant, they are typically not favored by deer.
  • Yarrow (Achillea): A hardy perennial with a strong scent.
  • Russian Sage (Perovskia): Its aromatic foliage makes it less appealing.

Shrubs and Ground Covers

These can provide structure and protection:

  • Boxwood: A dense evergreen shrub that deer usually avoid.
  • Viburnum: Some varieties are more resistant to deer browsing.
  • Creeping Thyme (Thymus): A low-growing ground cover that is aromatic.

Native Plants

Incorporating local flora can enhance resistance:

  • Butterfly Weed (Asclepias tuberosa): Attractive to pollinators and generally avoided by deer.
  • Beautyberry (Callicarpa americana): This native shrub has minimal deer pressure.

Edible Plants

If you want to grow food, consider these options:

  • Chicago Hardy Fig: Deer tend to leave this fruit tree alone.
  • Herbs like Oregano and Thyme: These not only deter deer but also add flavor to your cooking.

By choosing a combination of these plants, you can create a beautiful garden less susceptible to deer damage while providing some edible options.

Can deer-resistant plants also attract beneficial wildlife?

Deer-resistant plants can indeed attract beneficial wildlife,  making them an excellent choice for creating a vibrant garden ecosystem. Here are some key points regarding how these plants support various forms of wildlife.

Benefits of Deer-Resistant Plants for Wildlife

Attraction of Pollinators

Many deer-resistant plants are also highly attractive to pollinators such as bees, butterflies, and hummingbirds. For example:

  • Butterfly Weed (Asclepias tuberosa): This native plant is resistant to deer and serves as a food source for butterflies and other pollinators.
  • Coneflower (Echinacea purpurea): Known for its beautiful flowers, it attracts bees and provides seeds that feed birds.

Providing Shelter

Certain deer-resistant plants offer shelter and nesting materials for birds and small mammals:

  • Wild Geranium (Geranium maculatum): Its foliage provides cover for small birds, while its flowers attract pollinators
  • Little Bluestem (Schizachyrium scoparium): This grass not only shelters birds but also attracts insects, supporting overall biodiversity in the garden.

Food Sources for Wildlife

Some deer-resistant plants produce fruits or seeds that serve as food sources:

  • Spicebush (Lindera benzoin): This shrub produces berries that are a food source for various bird species, while its flowers attract butterflies.
  • Wild Indigo (Baptisia australis): Its seeds nourish birds and small mammals, enhancing the garden’s ecological value.

Creating a Balanced Ecosystem

By incorporating a variety of deer-resistant native plants, gardeners can create habitats that support diverse wildlife, promoting a balanced ecosystem. This approach deters deer and fosters an environment where beneficial insects and animals can thrive. In summary, planting deer-resistant species can significantly enhance your yard’s appeal to beneficial wildlife while reducing the risk of damage from deer.

Managing Deer on Your Property

Deterring deer with repellents or scare devices is one way to go. Deer control is more straightforward if the deer can’t link your yard with a convenient eating spot. In the fall, once deer have adjusted to several noises, you may switch between these approaches as needed. Once deer are used to a particular sound, they cease ignoring it. You may not have noticed if there was minor damage over the summer; it will become more apparent as winter draws near. Temporary fencing, permanent fencing, and tree guards can all help. However, if none of these solutions work, it’s time to call the experts!

Paradise Landscape and Hardscapes in Annapolis, MD 

We’ve been in business for decades in our hometown of Annapolis. We are a small, independently run business that services Anne Arundel County and parts of the Eastern Shore. If you need help with deer on your property, contact us!

Free Estimate

For any homeowner, maintaining a beautiful lawn that makes you the envy of your neighbors is crucial. One essential step to achieving this is overseeding immediately after core aeration. In this guide, “The Complete Guide to Aeration and Overseeding for a Healthier Lawn,” we’ll explore why overseeding after core aeration is necessary and how to use a plug aerator properly. We’ll also cover the importance of creating sufficient aeration holes to maximize seed-to-soil contact and improve germination rates.

Additionally, we’ll offer advice on selecting the best grass seed for your lawn renovation and tips for evenly distributing it with a lawn spreader. By following the steps in the complete guide to aeration and overseeding for a healthier lawn, you can ensure that your beautiful lawn stays well-maintained and healthy throughout the year.

The Importance of Lawn Aeration in Annapolis, Maryland

Maintaining a beautiful lawn isn’t just about aesthetics; it’s about creating a healthy, thriving environment that makes you the envy of your neighbors. For homeowners in Annapolis, Maryland, lawn aeration is one of the essential steps to achieve this. This guide will explore why overseeding immediately after core aeration is crucial and how to use a plug aerator correctly. We will also discuss the significance of having adequate aeration holes to ensure optimal seed-to-soil contact and enhance germination rates. Furthermore, we can give you an idea of selecting the appropriate grass seed for your lawn renovation project and utilizing a lawn spreader to distribute it evenly.

Why Lawn Aeration and Seeding Help Your Lawn

The Benefits of Aeration and Overseeding

  • Improves Soil Structure and Health: Aeration alleviates several soil issues. Soil compaction refers to the compression of soil particles, which can restrict the movement of air, water, and nutrients deep into the soil. Aeration reduces soil compaction, enhancing the flow of air, water, and nutrients to the grassroots, leading to healthier and more robust lawn growth.
  • Enhances Root Growth: Aeration helps grass develop robust, resilient root systems by creating growth pathways for roots.
  • Boosts Overall Lawn Health: Improved root growth and reduced compaction result in a healthier, more vibrant lawn.
  • Enhances Water Absorption: Aeration allows better water infiltration, preventing runoff and ensuring moisture reaches deep into the soil where it is most needed.
  • Reduces Thatch Buildup: By creating holes in the soil, aeration helps break down thatch, the layer of organic matter that can suffocate grass if it becomes too thick. Aeration helps break down thatch—a layer of dead grass and roots—by allowing soil microorganisms to do their job more effectively.
  • Promotes New Growth: Overseeding introduces new grass varieties to your lawn, helping to fill in bare spots and thicken the turf, resulting in a more uniform and attractive appearance.
  • Increases Disease and Pest Resistance: A diverse mix of grass species from overseeding can enhance your lawn’s resistance to diseases, pests, and environmental stressors.
  • Boosts Lawn Resilience: Combined aeration and overseeding improve your lawn’s overall resilience to drought, heavy foot traffic, and other wear and tear, ensuring it remains lush and green throughout the year.

Prepare Your Lawn for Aeration and Overseeding

Preparing your lawn correctly is essential to achieve the best results from aeration and overseeding. Here are the steps:

  1. Mow the Lawn Short: This reduces soil compaction and makes it easier for water, nutrients, and air to reach grass roots.
  2. Clear Obstructions: Remove leaves, sticks, and other debris impeding aeration.
  3. Moisten the Ground: Water your lawn a few days before aeration to ensure the soil is moist.

When selecting a fertilizer for your lawn, consider your specific regional climate and soil type. Different fertilizers are formulated to address the particular needs of various regions and soil types, so choosing one tailored to your lawn’s specific conditions is crucial.

Once you have chosen the appropriate fertilizer, the next step is to distribute it evenly. Depending on your preference and the size of your lawn, you can use a broadcast or drop spreader. Both tools are designed to ensure that the fertilizer is spread uniformly, which is essential for achieving consistent and healthy growth across your entire lawn.

By carefully selecting a fertilizer suited to your regional climate and soil type and then applying it evenly using the appropriate spreader, you can help promote the health and vitality of your lawn for optimal coverage and nutrient distribution.

Aerate Your Lawn

To promote healthy growth, aeration requires the removal of small plugs of soil from your lawn to provide direct access to the root systems for essential nutrients, water, and oxygen. This process fosters strong and healthy roots, improving turfgrass plants’ overall health through improved circulation.

There are two main types of aeration:

  1. Core Aeration: A machine with hollow tines removes small soil cores from the turf surface, creating openings for air, moisture, and nutrients to reach the roots.
  2. Plug Aeration: Removes plugs or chunks of soil from the turf surface, creating larger holes that allow air, water, and nutrients to penetrate deep into the roots.

How to Use a Plug Aerator Correctly

Using a plug aerator might seem daunting, but it’s pretty straightforward with the correct approach:

  1. Choose the Right Time: Due to optimal growing conditions, early fall or spring are ideal times for aeration in Annapolis.
  2. Prepare Your Lawn: Mow your lawn to a shorter height than usual and water it lightly to soften the soil.
  3. Aerate:
  • Utilize a plug aerator to remove soil plugs approximately 2-3 inches deep and 2-4 inches apart.
  • Ensure even coverage across your entire lawn to avoid patchiness.

Overseed Your Lawn

Overseeding is essential for keeping your grass lush and healthy. It involves planting a new layer of grass seed on top of existing turf, filling in bare spots or thinning areas, and increasing the overall density and diversity of your lawn’s grass species.

  1. Choose the Right Seed: Select a grass seed suitable for your climate and soil conditions. Cool-season grasses like Kentucky bluegrass are better for northern climates, while warm-season varieties like Bermuda or Zoysia thrive in southern regions.
  2. Prepare the Area: Remove weeds or debris from the surface before spreading the seeds evenly with a spreader.
  3. Rake and Water: Lightly rake over the seeded area to ensure good contact between soil and seeds, then water thoroughly until moist but not saturated.

After planting new seeds, it is recommended that the newly planted areas be covered with a layer of mulch or straw. This layer of mulch or straw provides additional protection to the seeds during germination, helping to keep the soil moist and protecting the seeds from harsh weather conditions.

Choosing the Right Grass Seed

Choosing the correct grass seed for a successful lawn renovation is vital; not all seeds are created equal.

  • Consider Local Climate: Choose grass varieties well-suited to Annapolis, such as fescue or bluegrass.
  • Assess Your Lawn’s Needs: Identify areas that need specific traits like shade tolerance or drought resistance.
  • Purchase Quality Seed: Invest in high-quality seed with a high germination rate and minimal weed seed content.

In Annapolis, the optimal times for aerating and overseeding lawns are primarily during late summer to early fall, specifically from mid-August to late October. This period is ideal because the soil remains warm enough to support seed germination, and the cooler temperatures of fall help establish new grass before winter.

Key Timing Details

  1. Late Summer to Early Fall (Mid-August to Late October): This is the best window for aeration and overseeding. The warm soil promotes seed germination, and the fall weather conditions are generally favorable for grass establishment.
  2. Early Spring (March to April): If you miss the fall window, early spring is the second-best time to overseed. However, it’s crucial to avoid seeding too early, as the soil needs to be warm enough for successful germination.

Additional Considerations

  1. Soil Testing: Before starting any aeration or overseeding, conducting a soil test is recommended to determine nutrient needs and pH adjustments, such as lime application if necessary
  2. Frost Risk: Be mindful that seeding should ideally be completed by mid-October to avoid damage from early frosts, which can harm young seedlings

By following these guidelines, homeowners in Annapolis can ensure a healthy and thriving lawn through proper aeration and overseeding practices.


FAQs

How adequate are aeration and overseeding?

Aeration and overseeding are highly effective lawn care techniques. Aeration reduces compaction, improves soil structure, enhances water infiltration and nutrient uptake, and promotes the growth of beneficial microorganisms. Overseeding introduces resilient grass varieties that are better equipped to withstand drought and disease, leading to a healthier lawn with improved drainage, oxygenation, nutrient availability, and resistance to pests and diseases.


When Should I Aerate My Lawn?


The ideal time to aerate your lawn is late summer to early fall after the growing season has ended. This allows the grass to recover from the aeration process and ensures strong, healthy new growth. More frequent aeration may be necessary for those living in areas with clay-heavy soil. In Anne Arundel County and Annapolis, the prime months for aeration are September and October, just before the ground starts to freeze, giving your soil time to breathe before the cooler months set in. The type of grass you have also influences the timing. For fescue, bluegrass, or ryegrass, this fall timeline is optimal.

How does aeration help reduce puddling on my lawn?

Aerating your lawn helps reduce puddling by improving soil drainage. The process involves creating small holes in the soil, which allows water to penetrate more deeply and evenly. This alleviates soil compaction, enabling water to move through the soil rather than pooling on the surface. As a result, aeration enhances the soil’s ability to absorb moisture, reducing the formation of puddles after rainfall or irrigation.

How does aeration improve soil drainage?


Aeration improves soil drainage by creating small holes in the soil, which enhances the soil structure and allows water to penetrate more effectively. Here are the key ways in which aeration helps improve soil drainage:

  1. Alleviating Soil Compaction: Aeration reduces soil compaction by creating air spaces within the soil structure. Compacted soil has fewer pores, which restricts water movement and leads to poor drainage. By perforating the soil, aeration increases the number of pores, allowing water to move more freely through the soil profile.
  2. Increasing Water Infiltration: The holes created during aeration act as channels for water to infiltrate the soil more deeply. This reduces surface runoff and puddling, as water can penetrate the soil rather than accumulate on the surface. Improved infiltration ensures water reaches the root zone, promoting healthier plant growth.
  3. Enhancing Soil Structure: Aeration improves the overall soil structure by mixing soil particles and creating a more porous environment. This enhanced structure allows for better water retention during dry periods and improved drainage during wet conditions. The air spaces (pores) between soil particles are crucial for holding water and facilitating its movement through the soil.
  4. Promoting Root Growth: Aeration reduces compaction and improves soil structure, encouraging more profound and extensive root growth. Healthy roots can absorb water more efficiently, reducing the likelihood of waterlogging and improving the lawn’s overall resilience to drought and heavy rainfall.
  5. Preventing Thatch Buildup: Aeration helps manage thatch, a layer of organic material that can impede water movement if it becomes too thick. By breaking up thatch, aeration ensures that water can reach the soil more efficiently, enhancing drainage and reducing the risk of waterlogging.


In summary, aeration is a vital lawn care practice that improves soil drainage by alleviating compaction, increasing water infiltration, enhancing soil structure, promoting root growth, and preventing thatch buildup. These benefits collectively lead to a healthier, more resilient lawn capable of effectively managing water.


Professional Lawn Aeration

Lawn aeration is a crucial part of professional lawn care, often overlooked by many homeowners. If you need more time or prefer to rely on experts, consider a company like Paradise Landscapes and Hardscapes. With over a decade of experience, our lawn care technicians are well-versed in aeration and servicing throughout Anne Arundel County and Annapolis. If you need our expertise to ensure your lawn is healthy and boasts curb appeal, fill out our quick FREE estimate by clicking the button below.

With these 23 inspiring ideas, transform your garden shed into more than just a storage space. Whether you’re a gardening enthusiast, a DIY lover, or someone looking to elevate your backyard, these concepts will help you create a functional and beautiful escape. We’ll also provide practical tips on implementing these ideas, so you can easily bring these transformations to your garden shed. As always, if you need a hand with your 24 inspiring garden shed ideas for a beautiful backyard escape project, feel free to fill out our short form at the end of this blog post!

24 Inspiring Garden Shed Ideas for a Beautiful Backyard Escape

Tinker House

Imagine a charming potting shed bathed in natural light, an ideal sanctuary for nurturing seedlings and repotting plants. This inviting space is thoughtfully designed to inspire both novice and seasoned gardeners. The shed features a clean entryway, skillfully crafted with a combination of pea gravel and pavers, offering a warm welcome. Elegant wood carvings embellish the structure, adding a touch of timeless beauty. Arched windows enhance its aesthetic appeal and ensure ample sunlight floods the interior, creating a serene environment for gardening.


Garden Shed + Greenhouse

Combining practicality with style by merging a garden shed with a greenhouse creates an innovative and functional space. This DIY project offers a versatile area for gardening tasks and a tranquil sanctuary for relaxation. Integrating a shed’s storage capabilities with a greenhouse’s nurturing environment gives you a perfect spot for potting plants, organizing tools, and enjoying a peaceful retreat amidst your greenery. Whether you’re an avid gardener or just looking to unwind, this combined structure will enhance your gardening experience and leisure time.


Greenhouse Lounge

Create a cozy lounge area within your Greenhouse shed by setting up a space with plush seating and soft lighting. Decorate it with unique thrift store art pieces to add character and warmth, and incorporate comfortable furniture like cushioned chairs and a small coffee table. Add a few potted plants for a touch of greenery, making it an inviting spot for relaxing evenings with a book or enjoying the view of your garden.


Flower Station

Designed with flower gardeners in mind, this airy station features a spacious sink and a butcher block island, providing ample workspace for all your gardening needs. The addition of scalloped shelving offers both functionality and charm, while vintage decor elements contribute to creating a delightful and inspiring atmosphere for arranging and organizing beautiful floral displays. Whether you’re preparing elaborate bouquets or simply enjoying a quiet moment with your favorite blooms, this space is perfect for nurturing your passion for gardening.


Garden Shed Workshop

A spacious workshop shed, thoughtfully designed with a large workbench and a picturesque window, allows abundant natural light to flood in, creating an inviting atmosphere. This enhanced illumination improves visibility and energizes your potting environment, making it an ideal haven for many DIY projects. Whether you’re crafting, building, or simply organizing, this workshop is ideally suited to inspire creativity and productivity.


Home Office Shed

Do you need a tranquil workspace away from home distractions? A backyard office shed, nestled amidst flourishing raised garden beds, offers a serene and inspiring environment that enhances productivity. Imagine starting your workday surrounded by vibrant colors and gentle fragrances of blooming flowers and fresh herbs, creating a peaceful oasis at your doorstep. This tranquil setting stimulates creativity and provides a refreshing escape from the typical indoor office space, allowing you to connect with nature as you tackle your daily tasks.


Garden Retreat

Inspired by the English country style, this shed is a cozy getaway that exudes tranquility. Decorated with reclaimed materials and lush plants, this cozy haven offers a perfect escape from the daily routine. The unique blend of rustic charm and vibrant greenery creates an inviting atmosphere where you can unwind and enjoy a moment of tranquility away from the hustle and bustle of everyday life.


Multifunctional Shed

Versatility is key. This Multifunctional Shed structure is thoughtfully designed to cater to various needs. It includes spacious storage for tools and equipment, a well-organized potting area for gardening enthusiasts, and comfortable, relaxing seating. This makes it ideal for engaging in various activities, whether you’re tending to your plants, storing outdoor gear, or simply enjoying a peaceful moment in your garden.


Photo courtesy of Amberblue Media & Design

Cozy Corner

Transform your shed into a cozy retreat by incorporating comfortable seating, such as plush chairs or a cushioned bench, and layering soft textiles like throw blankets and decorative pillows for added warmth and comfort. Enhance the atmosphere with ambient lighting, using string lights or a gentle lamp to create a soothing glow. This inviting space will be perfect for unwinding with your favorite book or enjoying a steaming cup of tea while escaping the daily hustle and bustle, making you feel cozy and at ease.


Photo Courtesy of Amberblue Media and Design

Rustic Retreat

Channel rugged charm with a rustic-style shed emphasizing natural wood elements, such as exposed beams and rough-hewn panels. This design highlights the beauty of the wood’s natural grain and complements the surrounding greenery, creating an inviting atmosphere in your garden. Add some vintage-style hardware and climbing plants for an extra touch of character and warmth.


Potting Paradise

A dedicated potting shed with spacious work areas and colorful decor can significantly enhance your gardening experience, making it both productive and enjoyable. Imagine having ample room to organize your tools, pots, and seeds while bright, cheerful colors surround you, inspiring creativity and relaxation. With the addition of shelves for easy access to all your gardening necessities and a comfortable seating area to plan your next planting session, your potting shed becomes a workspace and a personal sanctuary where you can cultivate your gardening passion.


Swedish-Style Shed

Boasting traditional Swedish barn red paint, this charming shed adds an authentic touch to any garden setting. Its rich color pays homage to Swedish heritage and is a striking focal point amidst lush greenery. Beyond its aesthetic appeal, the shed provides a practical space for storing gardening tools and supplies, effortlessly blending functionality with cultural flair.


A-Frame Salvage Shed

Styled after whimsical cottages, this A-frame shed is a charming retreat that captures the essence of rustic elegance. Constructed using salvage materials, it exudes an old-world charm that is both enchanting and eco-friendly. With their vibrant colors and intricate designs, the stained glass windows add a unique character and create a play of light that dances across the walls. This delightful shed is a functional space testament to the beauty of repurposed materials and creative design.


The Norwegian Orangery Shed

A cozy orangery featuring expansive glass windows creates a delightful greenhouse effect, allowing natural light to flood the space and nurture your plants. Surrounded by lush ivy clinging to its exterior, this charming structure seamlessly blends into your backyard, adding aesthetic appeal and practical functionality for garden enthusiasts. This orangery enhances any outdoor space, Whether as a serene retreat or a vibrant plant sanctuary.


Classic and Elegant Shed

Designed by the renowned duo Chip and Joanna Gaines, this classic shed features beautifully reclaimed doors that add a rustic charm. It enhances any garden space with its timeless aesthetic. It provides a perfect blend of functionality and style, making it an ideal addition for those who appreciate design and utility in their outdoor areas. Whether used for storage or as a charming garden retreat, this shed is a testament to the craftsmanship and eye for detail that the Gaines are celebrated for.


Charming Charm Shed

Infuse your shed with whimsy by adorning it with charming vintage signs that evoke a sense of nostalgia and character. Add a touch of magic with twinkling fairy lights that create a warm and inviting glow, perfect for evening relaxation or gatherings. Incorporate decorative elements like colorful planters, quirky garden ornaments, and personalized touches that reflect your unique personality and transform your shed into a cozy retreat or creative workspace.


Elevated Entertainment Shed

Transform your shed into a charming outdoor entertaining space, ideal for hosting gatherings with friends and family. With creativity and effort, you can create a cozy and inviting area perfect for summer parties and casual get-togethers. Consider comfortable seating, ambient lighting, and a small bar or grill to make the space functional and enjoyable. Personal touches like decorative plants or colorful cushions can enhance the atmosphere, making your shed the go-to spot for memorable evenings under the stars.


Shutter Style Shed

Enhance the character of your shed’s exterior by installing decorative shutters in bold colors or eye-catching patterns. These additions not only provide a unique visual appeal but also allow you to express your personal style. Whether you opt for vibrant hues or intricate designs, these shutters can transform your shed into a standout feature in your garden or backyard, adding charm and personality to the space.


Tiny Hut Shed

This compact structure serves as an adorable retreat or play area for children, providing a cozy, imaginative space to let their creativity run wild. It’s the perfect addition to a backyard, offering endless opportunities for fun and adventure, whether they’re hosting a tea party, embarking on a pirate quest, or simply enjoying a quiet moment with a book.


Garden Gate Shed

Enhance privacy and security around your garden by installing a decorative fence that adds aesthetic appeal and provides a sense of seclusion. This fence can lead to your garden office or shed, creating a defined and charming pathway. You can create an inviting and protected environment perfect for work or relaxation by choosing materials and designs that complement your outdoor space.


Vintage Decor Shed

Incorporate vintage elements like chandeliers or rustic furniture to create an inviting atmosphere inside your garden shed. Consider installing a charming chandelier to add a touch of elegance and warmth. Pair it with rustic furniture, such as a reclaimed wood table or antique chairs, to evoke a sense of history and character. These additions can transform your garden shed into a cozy retreat, perfect for relaxation or entertaining guests.


Tile Backsplash Shed

Decorate the interior of your shed with charming vintage tile backsplashes that add character and style to the space. Complement these with functional storage solutions such as under-sink curtains that conceal supplies and enhance the overall aesthetic. Consider adding shelves lined with baskets for organizing tools and accessories and incorporating hooks for hanging garden equipment, making the space practical and visually appealing.


Playhouse Paradise

Transform a garden shed into a charming playhouse for kids. Start by painting the walls with bright, cheerful colors to create an inviting atmosphere. Add fun elements like chalkboard walls where children can express their creativity and draw their favorite scenes. Include comfy bean bag chairs for a cozy seating option during storytime or play. Consider adding a small table and chairs for arts and crafts or snack time. Personalize the space with colorful rugs, curtains, and string lights to create a magical retreat for imaginative play.


Clutter Junk Garden Shed

Passionate gardeners often appreciate the convenience of keeping their gardening tools and mess hidden. If you’re one of them, consider customizing a garden shed from a big box store. Check out this customized garden shed as inspiration. This is also a great video that shares inspo on how to organize that outdoor junk shed. The vibrant green hedge beautifully complements the weathered gray paint, while galvanized steel planters enhance the color palette. With a little paint and effort, you can personalize any pre-fabricated shed. The latticework at the base suggests a raised foundation resting on a stable layer of pea gravel. This garden shed is designed to be functional and durable for years.

Whenever you are creating beauty around you, you are restoring your own soul. – Alice Walker 

We hope you’ve enjoyed this blog post Discover 23 inspiring garden shed ideas to transform your outdoor space into a functional and beautiful backyard oasis. Whether you’re looking for creative garden shed designs or practical uses, these ideas can help bring your dream shed to life. Join our community of gardening enthusiasts and DIY lovers for expert tips and inspiration to enhance your garden.


Happy gardening! 🌿

Photos courtesy of Amberblue Media & Design


FREE Estimate

As autumn rolls in, there’s nothing like the sight of vibrant chrysanthemums to really set the season in motion. Whether I’m strolling through the neighborhood or making a quick grocery run, those rich hues of gold, orange, and burgundy seem to be everywhere, lighting up the world with fall vibes. And when I finally place a few pots of mums on my porch, that’s when I know—it’s officially fallen. But did you know there’s so much more to these beloved blooms than meets the eye? Even if you’re a seasoned mum enthusiast, these 5 Intriguing Chrysanthemum Facts to Spark Your Fall Spirit blog post might deepen your appreciation as you shop for your autumn display.

5 Intriguing Chrysanthemum Facts to Spark Your Fall Spirit


1. Ancient Roots in China

Chrysanthemums have charmed people for over 3,000 years, originating in China, where they were first cultivated and recorded as early as the 15th century BC. The Chinese revered mums for their medicinal qualities, using their boiled roots to treat headaches. They’re also celebrated as one of the “four noble plants” in Chinese culture, symbolizing autumn and representing virtues like nobility. These elegant flowers were as much a staple in ancient art and poetry as they are in fall décor today.

2. A World of Symbolism

Across the globe, the meanings tied to chrysanthemums shift with each culture. In the U.S., these cheerful flowers embody joy and positivity. In Japan, the chrysanthemum holds a place of honor—it’s been the emblem of the imperial family for over 1,200 years and even has its own holiday, Chrysanthemum Day, celebrated as the Festival of Happiness on September 9. However, in some European countries, such as France, Belgium, and Spain, chrysanthemums are linked to remembrance and mourning, often found adorning gravesites as tributes to the departed.

3. A Rainbow of Choices

Despite their name—derived from the Greek words “chrysos” (gold) and “anthemon” (flower)—chrysanthemums offer more than just golden hues. In fact, there are thousands of varieties in a spectrum of colors, from classic yellows and oranges to striking reds, purples, pinks, and whites. And the diversity doesn’t stop at color. Mums bloom in various forms, too—think pompons, buttons, spiders, and spoons—giving you endless options to mix and match in your fall arrangements.

4. Mums: A Feast for More Than the Eyes

Chrysanthemums are not just pretty to look at; they can also be delicious! Chrysanthemum tea, made from dried flowers, is a favorite in China, where it’s sipped for its floral flavor and potential health benefits. The leaves, too, are edible and can be added to salads or sautéed like other greens. But before you start nibbling on your garden mums, picking up edible varieties from a local market is best to ensure they’re free from harmful pesticides.

5. Nature’sNature’s Insect Fighter

Did you know chrysanthemums can do more than decorate your porch? These plants contain pyrethrum, a natural compound used in insecticides for centuries. While a few pots of mums might not be enough to keep the mosquitoes away, pyrethrum, extracted from certain chrysanthemum species, is a critical ingredient in many bug sprays. Next time you check your insect repellent, look for this plant-powered ingredient working its magic.

So, as you prepare to usher in autumn, let these fun facts about chrysanthemums add an extra layer of appreciation to your fall festivities!

How do I grow Mums?

Growing chrysanthemums (mums) is relatively simple, and with a bit of care, you’ll enjoy their vibrant blooms throughout the fall season. Here’s a step-by-step guide to help you successfully grow mums:

Choosing the Right Mums

  • Perennial or Annual? Mums can be perennial (meaning they come back year after year) or annual (blooming for one season and then dying). If you’re looking for longevity, make sure you’re buying perennial hardy mums. Annual mums are usually less cold-tolerant.
  • Select Healthy Plants When buying mums, choose plants with plenty of unopened buds and healthy green foliage. This will ensure longer-lasting blooms.

Ideal Planting Time

  • Best Time for Perennials: It’s ideal to plant perennial mums in the spring or early summer so they have time to establish strong roots before winter. However, many plant mums in the fall for instant seasonal beauty, though this limits their chances of survival over winter.
  • Fall Planting Tip: If planting in fall, give them at least 6-8 weeks before the first frost to help them get established.

Pick the Perfect Spot

  • Sunlight Mums thrive in full sun, so choose a location with at least 6 hours of sunlight daily. They can tolerate partial shade but will produce fewer flowers.
  • Soil Mums prefer well-draining soil that’s rich in organic matter. If your soil tends to retain water, amend it with compost or sand to improve drainage.

Planting

  • Spacing: Plant mums about 18-24 inches apart to allow air circulation and give them room to grow.
  • Depth: Dig a hole slightly larger than the root ball, ensuring the plant crown (where the stems meet the roots) is level with the soil. Mums don’t like to be buried too deep.

Watering

  • After planting, water sincerely to help the roots settle. Keep the soil evenly moist but not soggy, especially in the weeks following planting.

Caring for Mums


Watering: Mums like consistent moisture, so water them when the top inch of soil feels dry. Aim for watering the base of the plant to avoid wetting the leaves, which can promote diseases.

Mulching: Apply a layer of mulch (like straw or shredded leaves) around the base to help retain moisture and protect the roots from temperature fluctuations.

Fertilizing: Fertilize mums in the spring and early summer with a balanced, slow-release fertilizer. Avoid fertilizing after midsummer, as this encourages foliage growth over flowers.

Pinching for Bushier Plants: To encourage a fuller, bushier plant with more blooms, pinch off the top inch or so of new growth every few weeks from spring to mid-July. Stop pinching by late summer to allow flower buds to form.

Overwintering Your Mums

  • If you plant mums in the spring, they’ll have a better chance of surviving winter. After the first frost, don’t cut back the plants. Instead, leave the stems and cover them with mulch to insulate the roots.
  • If you planted in the fall, treat your mums like annuals or try to overwinter them by heavily mulching them and hoping for the best. In colder climates, it’s often better to bring them indoors to a cool, dark place like a garage and replant them in spring.

Pest and Disease Prevention

  • Keep an eye out for aphids, spider mites, and mildew. A strong stream of water can wash away insects, and fungicides can help if mildew appears.
  • Good air circulation and watering the soil (rather than the leaves) help reduce disease risk.

By following these steps, you’ll have healthy, blooming mums who can brighten up your garden or patio all autumn! If you’re lucky and plant early, you may even enjoy their beauty year after year.

5 Intriguing Chrysanthemum Facts to Spark Your Fall Spirit blog post might deepen your appreciation as you shop for your autumn display.

Tomatoes are a beloved garden staple, and pruning them correctly can significantly boost your harvest. For gardeners in Annapolis, MD, knowing how to prune tomatoes correctly is essential for maintaining healthy plants and maximizing fruit production. This guide will walk you through the best practices for pruning tomato plants in this region, ensuring a bountiful and disease-free harvest. Please continue reading below to discover how to prune tomatoes in Annapolis with our step-by-step guide. Boost your harvest and prevent diseases with these expert tips.

Key Tips for Pruning Tomato Plants in Annapolis, MD

  • Prune Indeterminate Varieties Indeterminate tomato plants continue growing throughout the season and benefit the most from regular pruning. Determinate varieties, which grow to a set size and produce fruit all at once, generally do not need pruning.
  • Remove Suckers Suckers are small shoots that grow between the main stem and branches. These can drain energy from the plant. Pinch off suckers when they are 2-4 inches long to promote better air circulation and fruit production.
  • Trim Lower Leaves and Branches Trim off the lower leaves and branches up to the first fruit cluster. This practice improves air circulation and reduces the risk of soil-borne diseases.
  • Prevent Fungal Diseases Remove any leaves touching the soil to prevent fungal infections. Keeping the foliage off the ground is crucial for maintaining plant health.
  • Prune on Dry, Warm Days: Prune your tomato plants on dry, warm days. This allows pruning wounds to heal quickly, reducing the risk of disease.
  • Timing Your Pruning Stop pruning about 30-40 days before the first expected frost in Annapolis, typically mid-October. This timing allows the plants to set and ripen the remaining fruits.
  • Use Clean, Sharp Tools Always use clean, sharp pruning shears or pinch off smaller shoots with your fingers to prevent damage and disease spread.
  • Maintain Main Stems: Aim to maintain 1-3 main stems on your tomato plants. This focus directs the plant’s energy towards fruit production rather than excessive foliage growth.
  • Support Your Plants Consider using stakes or trellises to support pruned plants. This support helps manage the plant’s growth and makes pruning easier.
  • Apply Mulch Mulching around your tomato plants helps retain moisture and suppress weeds, creating a healthier growing environment.
  • Regular Pruning: Prune your tomato plants regularly throughout the growing season to keep them manageable and productive. Regular maintenance prevents the plants from becoming too bushy and unmanageable.
  • Leave Enough Foliage While pruning, ensure you leave enough foliage to shade the developing fruits and prevent sunscald. Balance is key to maintaining healthy plants.

Maximizing Your Tomato Harvest in Maryland’s Climate

Following these pruning practices can promote healthier plants and maximize your tomato harvest in Annapolis’s unique climate. Remember to adjust your pruning techniques based on the specific varieties you’re growing and the local weather conditions.

What are the best tools for pruning tomato plants in Annapolis, MD

Pruning tomato plants in Annapolis, MD, helps to promote healthier plants to maximize your tomato harvest. Based on the search results, the best tools for pruning tomato plants in Annapolis, MD are:

  • Bypass pruners or garden clippers are the most recommended tools for pruning tomatoes. Their scissor-like blades maneuver easily between branches and make clean cuts, reducing damage to the plant.
  • Pruning shears: Also known as hand pruners or secateurs, pruning shears are among the most commonly used tree-trimming tools and are suitable for tomato pruning.
  • Clean, sharp garden shears: These are recommended for removing more rigid or leathery suckers that can’t be pinched off by hand.
  • Your fingers: For small plants or tender shoots, you can pinch off suckers using your thumb and index finger.
  • Scissors: Scissors are not ideal tools for pruning tomato plants, but they can be used in a pinch.

When using any of these tools, it’s essential to keep them clean and sharp to make precise cuts and prevent the spread of diseases between plants.

Disinfect your pruning tools before moving from one plant to another. These tools will be practical throughout the growing season for Annapolis’s climate.

Remember to adjust your pruning practices based on the specific tomato varieties and local weather conditions you are growing.

Preventing tomato diseases Annapolis

To prevent disease when pruning tomato plants, follow these essential practices:

  • Use clean, sharp tools: Always prune with clean, sharp pruning shears or scissors. This ensures clean cuts and reduces the risk of spreading diseases.
  • Disinfect tools between plants: Clean and disinfect your pruning tools before moving them from one plant to another. Sanitize the tools with a dilute 10% solution of bleach, water, or alcohol.
  • Prune at the right time: Prune early in the morning after plants have dried. This allows pruning wounds to heal quickly and reduces the risk of infection.
  • Remove suckers when small: Pinch off suckers when they’re only 2-4 inches long. Removing more giant suckers creates more extensive wounds, which are more susceptible to infection.
  • Avoid working with wet plants: Don’t prune or handle tomato plants when damp, as this can spread diseases between plants.
  • Proper disposal: Remove and discard pruned branches away from your tomato plants to prevent potential disease spread.
  • Maintain air circulation: Prune to improve airflow around and within the plant, which helps prevent fungal diseases.
  • Remove lower leaves: Prune off the lower 6-12 inches of leaves to prevent soil-borne diseases from splashing up onto the plant.
  • Practice crop rotation: Don’t plant tomatoes or related plants in the same spot year after year to reduce the risk of soil-borne diseases.
  • Use mulch: Apply mulch around the base of plants to minimize soil splashing onto leaves, which can spread diseases.

Implementing these practices can significantly reduce the risk of disease transmission while pruning your tomato plants and promoting overall plant health. Stay tuned to our blog for more gardening tips and expert advice tailored to Annapolis, MD. Happy gardening!

FREE Estimate

Achieving and maintaining a lush, green lawn in Annapolis can be challenging. With the region’s harsh winters and hot summers, it’s easy to feel overwhelmed. But don’t worry—Paradise Landscape and Hardscapes is here to help! Our professional lawn care services ensure your yard looks its best year-round, regardless of season. Below are a few tips for: Mastering Maryland Lawn Care: Top Tips for an Impeccable Lawn in Annapolis.

Your lawn is one of the first things people notice about your Maryland home. That’s why it’s crucial to keep it well-maintained. Life can get busy, but with our expert guidance, you’ll know exactly what to do and when to keep your lawn thriving.

Your Comprehensive Maryland Lawn Care Schedule

Lawn care isn’t a one-time task; it requires attention throughout the year. Here’s a season-by-season guide to help you understand what’s needed to keep your lawn healthy and beautiful.

Winter Lawn Care

You might think winter means a break from lawn care, but that’s not entirely true. As long as the ground isn’t frozen, you can take steps in January and February to prepare for spring. Consider using a root growth stimulant, which acts like a vitamin for your lawn, helping roots expand and develop.

In Maryland, state regulations prevent using fertilizers from December 1 to March 1 to protect Chesapeake Bay. However, you can still perform soil tests and apply lime to balance soil acidity during this period.

Mastering Maryland Lawn Care: Top Tips for an Impeccable Lawn in Annapolis

Early Spring Lawn Care

As winter fades, it’s time to prepare your lawn for the growing season. Start by cleaning up your yard—rake lightly to remove dead leaves and debris. This prepares your lawn to absorb sunlight, air, water, and nutrients.

Prepare your mower by sharpening the blades, filling the tires with air, changing the oil, and ensuring everything is in order. Fertilize your lawn in March to boost nitrogen levels and apply a pre-emergent herbicide to prevent crabgrass and other weeds.

Late Spring Lawn Care

Continue mowing your grass weekly, keeping it 3 to 4 inches tall. Apply a second round of fertilizer and pre-emergent herbicide to manage weed growth. This is also the time for a follow-up weed treatment if necessary.

Early spring: Clean up debris, apply pre-emergent herbicide for crabgrass control, and fertilize lightly.

Late spring: Continue regular mowing and apply a second round of fertilizer.

Early Summer Lawn Care

Your hard work will pay off with a beautiful lawn by early summer. Mowing peaks during this season and mulching can help reduce the frequency. Apply a third fertilizer treatment and monitor for pests like chinch bugs and grubs, which can damage your lawn.

Late Summer Lawn Care

As temperatures cool, lawn growth may pick up. Mow regularly and water your lawn weekly to ensure deep hydration. Prepare for winter by applying a slow-release fertilizer.

Summer: Water 1-2 times weekly, mow as needed, and watch for pest issues.

Fall Lawn Care

Fall is crucial for lawn maintenance. Fertilize to promote thick, green grass and aerate to improve nutrient absorption. This is the perfect time for overseeding and applying post-emergent herbicides to control weeds.

Aerate: Oversaw bare patches and applied fall fertilizer to strengthen roots.


Embrace the Schedule for a Great Lawn

Caring for your lawn takes time and effort. You can achieve a thriving lawn by understanding the needs of your grass species and following a consistent mowing, watering, fertilizing, and weed control routine. If this sounds overwhelming, Paradise Landscape and Hardscapes are here to help. We offer various lawn care programs tailored to your budget and needs.

Following these tips and adapting to Annapolis’s specific climate and conditions, you can maintain a healthy, attractive lawn throughout the year. Always consider environmental impacts and follow local guidelines for lawn care practices.

Ready to transform your lawn in Anne Arundel County, Maryland? Get started today with a free quote. Contact us at 410-458-5588 or visit our website https://paradisescapes.com/ for more information. Let us take care of your lawn so you can sit back and enjoy it!

FREE Estimate

Is your lawn turning into a swamp after every rain? At Paradise Landscapes and Hardscapes, the first step to a stunning landscape design is a top-notch drainage system. Without it, water pools, seeping into your property and even draining into your neighbor’s yard. The outcome? A soggy, unusable lawn for you and a driveway-turned-lake for them! If you answered yes to any of the above, it’s time to Transform Your Yard with Expert Drainage Solutions from Paradise Landscapes and Hardscapes in Annapolis, MD!

Conquer Common Yard Drainage Problems

Every yard faces drainage issues, from small puddles to stubborn ponds. Water naturally flows downhill, collecting in your yard and creating a boggy mess. This takes away precious space for kids to play or pets to roam.


Your Yard Drainage Experts in Annapolis, MD

We’re the go-to experts for yard drainage solutions in Annapolis. Our skilled team tackles projects of all sizes. Does your property become the neighborhood’s water collection spot? Do you dread the sight of a pond forming whenever it rains? Paradise Landscapes and Hardscapes has you covered with effective stormwater management, including gravel-free dry wells for collection, retention, and discharge.

Spot the Signs of Poor Drainage

After a rainstorm, standing water is a clear sign of drainage issues. Your yard should absorb water and naturally redirect the excess. It’s often due to low spots or compacted soil when water pools.

Effective Yard Drainage Systems in Annapolis

Tips and Solutions for Standing Water:

  1. Redirect Water: Identify where water collects and divert it using French drains, catch basins, or swales. Swales are shallow channels that gather and redirect runoff away from your property.
  2. Loosen Compacted Soil: If your soil is clay-like or compacted from construction projects, use a cultivator to loosen it and mix in high-quality topsoil. This can improve absorption.
  3. Create a Rain Garden: For persistent dampness, consider a rain garden. Excavate the area, fill it with a mix of soil and gravel, and plant water-loving plants for a self-sustaining garden.

Expert Hardscaping Services to Combat Erosion

Drainage problems can also lead to soil erosion. Here’s how we can help:

  1. Enhance Hardscaping: Add features like driveways and sidewalks in problem areas.
  2. Build a Dry Creek Bed: Dig a trench, line it with landscape fabric, and fill it with gravel and stones to control water flow and prevent soil erosion.
  3. Secure Mulch with Rocks: Use pebbles and stones to keep mulch in place around garden beds.

Professional Solutions for Pathways and Patios

Walkways, patios, and paths can flood if not properly graded. Our solutions include:

  1. Install Gravel Pathways: Replace existing paths with gravel or stepping stones to improve water flow.
  2. Add Catch Basins: Direct water away through an underground drain with a catch basin.
  3. Underground Drains: Dig beneath pathways to install pipes that redirect water.
  4. Reposition Downspouts: Adjust gutter downspouts to prevent water from pooling on paths and patios.

Paradise Landscapes and Hardscapes offers customized, affordable solutions no matter your yard drainage challenges. Contact us today or complete our FREE ESTIMATE form to schedule an assessment and reclaim your yard from water woes!

FREE Estimate

We’ve got your back for all the plant enthusiasts out there struggling with dimly lit spaces, busy schedules, or frequent travel! Welcome to a guide that will transform even the most notorious houseplant killers into nurturing, green-thumbed champions. This post will delve into the world of low-light houseplants – a perfect solution for those seeking green companionship without abundant sunlight. At the end of this post is a detailed guide on caring for the 13 Best Low Light Indoor Plants.

Understanding Low-Light Houseplants

Before we list the incredible low-light plants, let’s address the common misconception about “zero sunlight” requirements. Unlike mythical plants that thrive in complete darkness, many low-light houseplants can endure and flourish in less-than-ideal lighting conditions.

In nature, certain plants adapt to limited sunlight by growing under the canopy of larger plants, receiving dappled or diffused light. Houseplants, being resilient organisms, have evolved to tolerate such conditions. It’s essential to comprehend that houseplant care involves an ongoing learning process, where success depends on various factors.

Characteristics of Low Light Plants

While these low-light warriors may not produce vibrant blooms, they compensate with slow, steady growth and large green leaves, optimizing their ability to capture available light for sustenance. Patience is key when caring for these plants, as they may take longer to reach maturity.


13 Low Light Indoor Plants

Here are our preferred low-light houseplants. While the post later outlines each plant’s detailed benefits, here’s a quick list for those seeking a brief overview.

  • Lucky Bamboo: A symbol of good fortune, this easy-to-care-for plant thrives in low light and adds an elegant touch to any space.
  • Spider Plant: Known for its air-purifying qualities, it is resilient and can adapt to various light conditions.
  • ZZ Plant: Almost indestructible, the ZZ plant is an excellent choice for low-light areas and requires minimal attention.
  • Golden Pothos: With its trailing vines and heart-shaped leaves, the golden pothos is a low-maintenance beauty that tolerates low-light conditions.
  • Kangaroo Fern: A unique and charming choice, the kangaroo fern thrives in moderate to low light, making it perfect for dimly lit spaces.
  • Red Prayer Plant: Renowned for its stunning foliage, the red prayer plant is a shade-loving option that adds color to your indoor oasis.
  • Areca Palm: Bring a touch of the tropics indoors with the areca palm, a low-light-loving plant that adds a tropical vibe to your home.
  • Peace Lily: Despite its name, the peace lily is a shade-loving plant that boasts elegant white blooms and air-purifying qualities.
  • Peperomia: Compact and diverse, peperomias are known for their unique leaf shapes and adaptability to low-light conditions.
  • Snake Plant: A true survivor, the snake plant thrives on neglect and is an excellent choice for low-light environments.
  • Peacock Plant: The Peacock Plant is the charismatic showstopper of indoor greenery, boasting vibrant, patterned leaves that dance with color, turning any space into a lively spectacle.
  • Dumb Cane: Dumb Cane is your silent companion in greenery. With its unique and exotic foliage, it effortlessly thrives indoors, proving that elegance doesn’t always need a loud statement.
  • Dragon Tree: This is your leafy co-pilot in the indoor jungle, adding a touch of mythical charm and slaying bad vibes one vibrant frond at a time!

Caring for houseplants can be manageable, especially for those with less-than-ideal lighting situations. With the proper selection of low-light plants and patience, anyone can cultivate a lush, green indoor haven. So, for all the aspiring plant parents, dive into the world of low-light houseplants and watch your indoor garden thrive in the shadows. Team Paradise is ROOT-ing for your success!

Who Can Benefit from Low Light Indoor Plants?

Low-light plants are ideal for individuals who reside in dimly lit apartments, maintain hectic work schedules, or seek low-maintenance plant care. They are particularly advantageous for those who wish to enjoy the beauty of indoor greenery without the need for constant attention. Additionally, if you are a frequent traveler and worry about your plants surviving your absence, these 13 low-light houseplants are guaranteed to add a touch of vibrancy to any room in your home.

Exploring the Advantages of Low Light Plants

Embracing low-light plants offers a myriad of benefits. They combine low maintenance with the same stunning beauty as their full-sun counterparts. Specifically designed for individuals dwelling in apartments with bustling schedules or frequent travelers, these houseplants offer a practical and aesthetic solution.

Their adaptability extends to homes with low or diffused lighting, as low-light plants can thrive in limited sunlight. Beyond their visual appeal, houseplants are crucial in enhancing indoor environments. They contribute to air purification, combat indoor pollutants, improve focus, and offer mental well-being benefits.

Common Pitfalls in Caring for Low-Light Plants

While some low-light houseplants are budget-friendly and require minimal effort, it’s important to note that they are not entirely maintenance-free. Like any other plant, the key to ensuring the longevity of low-light houseplants lies in consistent watering and regular fertilization. Many of these plants feature broad leaves that maximize light absorption in low-light conditions, translating to lower water requirements. Understanding and meeting these needs will help cultivate a thriving indoor oasis.
 

Unlocking the World of Low Light Houseplants: A Guide to Easy Care

Low-light indoor houseplants offer a green oasis for individuals navigating dim living spaces, bustling work schedules, or frequent travels. Our simple guide below elaborates on our 13 low-light houseplants. It sheds light on their benefits, common mistakes to avoid, and practical tips for keeping these leafy companions thriving in your home.

Are You a Serial Houseplant Killer? Fear Not!

Embarking on caring for indoor plants doesn’t have to be intimidating. If you have a less-than-stellar track record, this guide is here to help. Discover 10+ low-light indoor plants that defy the need for abundant sunlight, making them perfect for homes or offices with limited natural light.

While the quest for “zero” sunlight plants remains elusive, the post unravels the science behind why certain houseplants thrive in low-light conditions. It’s a delicate balance, and understanding the variables involved in houseplant care is crucial for success.

Who Can Benefit from Low-Light Indoor Plants?

Low-light plants are ideal for individuals who reside in dimly lit apartments, maintain hectic work schedules, or seek low-maintenance plant care. They are particularly advantageous for those who wish to enjoy the beauty of indoor greenery without the need for constant attention. Additionally, if you are a frequent traveler and worry about your plants surviving your absence, these 13 low-light houseplants are guaranteed to add a touch of vibrancy to any room in your home.

The Marvels of Low Light Plants

Low-light plants offer not only aesthetic appeal but also practical benefits. They require minimal maintenance while maintaining the same beauty as their full-sun counterparts. Suited for apartment dwellers with busy schedules or frequent travelers, these resilient plants thrive in low or diffused light, contributing to improved air quality, reduced indoor pollutants, enhanced focus, and mental well-being.

Avoiding Pitfalls in Low Light Plant Care

While some low-light houseplants are low-cost and low-maintenance, they still require care. They water when the soil is dry, and regular fertilization is key to their well-being. Oversaturating the soil can lead to root rot, and excess fertilizer during non-growing seasons may harm the roots. Understanding the specific needs of low-light plants, often characterized by large, light-catching leaves, is essential for success.

Nurturing Indoor Plants in Limited Sunlight

Certain houseplants can survive and thrive with a plant light or even in limited natural light for homes with few windows or areas deprived of ambient light. Alternatively, a GE Plant Light Bulb can be added to existing lamps to provide the necessary light. Ensuring the light is positioned appropriately prevents the plants from stretching and becoming “leggy,” a condition where stems grow excessively long without producing leaves.

Conclusion: Flourishing in the Shadows

This comprehensive guide is a beacon of support for those venturing into indoor plants, especially low-light varieties. These 10-plus houseplants, adorned with beauty and resilience, are poised to transform your space into a thriving haven of greenery. Whether you’re a seasoned plant parent or a novice, these low-light wonders are ready to make your home their sanctuary. Happy planting!


A Guide On How To Care For Indoor House Plants

These plants are suitable for rooms with no windows or north-facing windows; some can even survive on fluorescent light alone. However, when growing plants in low-light conditions, it’s important to remember that even low-light plants still need some light, so they should not be placed in total darkness.

Lucky Bamboo

The Lucky Bamboo (Dracaena sanderiana) is a fantastic indoor plant celebrated for its aesthetic appeal, ease of care, and symbolic significance in bringing good fortune. Here’s why it’s a great choice and tips on its care:

Benefits of Lucky Bamboo:

  • Symbolic Significance: Known for its association with good luck and positive energy in Chinese culture, the Lucky Bamboo adds a touch of symbolism to your indoor space.
  • Low Light Tolerance: Lucky Bamboo is adaptable to various light conditions, including low light. While it can tolerate low light, it appreciates bright, indirect light for optimal growth.
  • Low Maintenance: This resilient plant requires minimal attention, making it an excellent choice for busy individuals or those new to plant care.

Light Requirements:

Lucky Bamboo can thrive in low to moderate light conditions. While it can tolerate lower light levels, providing indirect sunlight enhances its growth. Avoid exposing it to direct sunlight for extended periods, which can scorch the leaves.

Care Tips:

  • Watering: Keep the Lucky Bamboo’s roots consistently moist but not waterlogged. Use distilled or filtered water to prevent mineral buildup on the leaves.
  • Soil: Use a well-draining potting mix if the plant is grown in soil. If grown in water, change the water regularly to maintain cleanliness and prevent stagnation.
  • Container: If you’re growing in soil, choose a container with drainage holes. For water cultivation, use a container that allows the roots to submerge without overcrowding.
  • Temperature and Humidity: Lucky Bamboo thrives in average room temperatures and is adaptable to moderate humidity levels. Please protect it from drafts and extreme temperature fluctuations.
  • Fertilizing: Fertilize sparingly during the growing season (spring and summer) with a balanced, diluted fertilizer. Reduce or eliminate fertilization during the fall and winter.
  • Pruning: Trim any yellow or damaged leaves using clean, sharp scissors to maintain the plant’s appearance.

Symbolic Arrangements:

Lucky Bamboo is often arranged in symbolic formations, such as a spiral for wealth or a bundle for happiness. These arrangements add cultural significance to the plant. Luckily, Lucky Bamboo is an excellent indoor plant for its visual appeal, cultural symbolism, and ease of care. It is ideal for both experienced plant enthusiasts and those new to indoor gardening.
Spider Plant

The Spider Plant (Chlorophytum comosum) is a popular and versatile houseplant known for its air-purifying qualities and adaptability to various indoor conditions. Here are several reasons why the Spider Plant is an excellent choice for indoor cultivation and some tips on caring for it:

Benefits of Spider Plants:

  • Air Purification: Spider Plants are excellent air purifiers. They can remove common indoor pollutants like formaldehyde and xylene, improving your home’s air quality.
  • Easy to Grow: Spider Plants are known for their resilience and adaptability. Even if you’re a novice plant parent with no green thumb, you’ll find Spider Plants forgiving and easy to care for.
  • Non-Toxic: Spider Plants are safe for pets. Unlike some houseplants that can be toxic to cats and dogs, Spider Plants are non-toxic, making them a pet-friendly choice for households with furry friends.
  • Produce Offsets (Pups): One of the unique features of Spider Plants is their ability to produce offsets, often referred to as “pups” or “spiderettes.” These baby plants grow on long stems and can be propagated to create new plants, making Spider Plants a great option for those looking to expand their indoor greenery.

Spider Plant Light Requirements:

Spider Plants are adaptable to light conditions, making them suitable for various indoor environments. They can thrive in bright, indirect light but tolerate lower light levels, making them versatile for homes with different lighting situations. However, they may not do well in direct, harsh sunlight, which can scorch their leaves.

Spider Plant Care Tips:

  • Light: Place your Spider Plant in bright, indirect light for optimal growth. It can tolerate lower light conditions but may not thrive in intense sunlight.
  • Watering: Spider Plants prefer consistently moist soil but avoid being waterlogged. Water them when the top inch of the soil feels dry. Overwatering can lead to root rot, so allowing the soil to dry between waterings is essential.
  • Soil: Use well-draining potting soil to ensure good aeration for the roots. Spider Plants are not overly picky about soil types but appreciate a well-balanced mix.
  • Temperature and Humidity: Spider Plants prefer average room temperatures and moderate humidity. They can tolerate slightly cooler conditions but should be protected from drafts and extreme temperature fluctuations.
  • Fertilizing: Feed your Spider Plant with a balanced, water-soluble fertilizer during the growing season (spring and summer) every 2-4 weeks. Reduce fertilization in the fall and winter when the plant’s growth slows.
  • Pruning: Trim yellow or brown leaves to encourage healthy growth. Remove the spiderettes to propagate new plants.

By providing your Spider Plant with the right conditions and regular care, you can enjoy the beauty and benefits of this charming houseplant in your indoor space.
ZZ Plant (Zamioculcas zamiifolia)

The ZZ Plant (Zamioculcas zamiifolia) is a popular indoor plant known for its resilience, low-maintenance nature, and adaptability to various indoor conditions. Here are several reasons why the ZZ Plant is an excellent choice for indoor cultivation and some tips on caring for it:

Benefits of ZZ Plant:

  • Low Light Tolerance: One of the ZZ Plant’s standout features is its ability to thrive in low-light conditions. It can adapt to various light levels, including low and indirect light, making it suitable for spaces with limited natural light.
  • Drought Tolerance: ZZ Plants are highly drought-tolerant and can go for extended periods without water. This makes them ideal for forgetful or busy plant owners needing help adhering to a strict watering schedule.
  • Air Purification: Like many other houseplants, the ZZ Plant improves indoor air quality by removing toxins such as benzene, formaldehyde, and xylene from the air.
  • Easy Care:  ZZ Plants are resilient and can withstand neglect. They are forgiving of occasional lapses in care, making them an excellent choice for beginners or those needing more plant maintenance time.

Light Requirements:

ZZ Plants are adaptable to light. They can tolerate low-light conditions and do well in bright, indirect light. However, they should be protected from direct sunlight, which can scorch their leaves. ZZ Plants are well-suited for offices, bathrooms, or rooms with minimal natural light.

Care Tips:

  • Watering: ZZ Plants prefer to dry out between waterings. Allow the top inch of soil to become dry before watering. Overwatering can lead to root rot, so letting the soil dry out partially between waterings is essential.
  • Soil: Use well-draining potting soil to prevent waterlogged conditions. A cactus or succulent mix is suitable for ZZ Plants.
  • Temperature and Humidity: ZZ Plants thrive in average room temperatures and tolerate low humidity. They are adaptable to different temperature ranges but should be protected from extreme cold.
  • Fertilizing: Fertilize ZZ Plants sparingly. During the growing season (spring and summer), you can apply a balanced, diluted fertilizer every 2-4 weeks. Reduce or eliminate fertilization during the fall and winter when the plant’s growth slows.
  • Pruning: While ZZ Plants are generally low-maintenance, you can trim back any yellow or damaged leaves. However, they don’t require extensive pruning.
  • Propagation: ZZ Plants can be propagated by dividing the rhizomes and underground stems, which can be done during repotting.

By following these care tips and providing your ZZ Plant with the right conditions, you can enjoy the beauty and durability of this resilient houseplant in your indoor space.

Golden Pothos (Epipremnum aureum)

The Golden Pothos (Epipremnum aureum), also known as Devil’s Ivy, is a popular and versatile houseplant offering numerous benefits for indoor spaces. Here are several reasons why the Golden Pothos is an excellent choice for indoor cultivation and some tips on caring for it:

Benefits of Golden Pothos:

  • Air Purification: Golden Pothos is known for its air-purifying qualities. It can effectively remove indoor pollutants like formaldehyde, benzene, and xylene, contributing to better air quality.
  • Adaptability: Golden Pothos is highly adaptable and can thrive in various indoor conditions. This makes it suitable for both beginners and experienced plant enthusiasts.
  • Low Maintenance: One of the key reasons for the popularity of Golden Pothos is its low-maintenance nature. It can tolerate various light levels and forgives occasional lapses in care.
  • Aesthetic Appeal: The Golden Pothos’s trailing vines and heart-shaped leaves add a touch of greenery and elegance to any indoor space. It’s often used in hanging baskets or as a trailing plant on shelves.

Light Requirements:

Golden Pothos is relatively flexible when it comes to light conditions. It can thrive in various lighting situations, including low to bright, indirect light. While it can tolerate lower light levels, it will grow more vigorously and produce more variegation in brighter conditions. However, direct sunlight should be avoided as it can scorch the leaves.

Care Tips:

  • Watering: Allow the top inch of the soil to dry out before watering. Golden Pothos prefers moderately moist soil but can withstand periods of drought. Overwatering can lead to root rot, so it’s crucial to maintain a proper watering balance.
  • Soil: Use a well-draining potting mix to ensure good aeration for the roots. A standard indoor plant mix is suitable.
  • Temperature and Humidity: Golden Pothos is adaptable to average room temperatures and humidity levels. It can withstand various conditions but should be protected from extreme temperature fluctuations.
  • Fertilizing: Feed your Golden Pothos with a balanced, diluted fertilizer every 4- 6 weeks during the growing season (spring and summer). Reduce or eliminate fertilization in the fall and winter when the plant’s growth slows.
  • Pruning: Trim back leggy or overgrown stems to encourage bushier growth. Regular pruning can help maintain the plant’s shape and appearance.
  • Propagation: Golden Pothos is easy to propagate through stem cuttings. Cut a healthy stem with a few leaves and place it in water or directly into the soil for root development.

Following these care tips, you can enjoy the Golden Pothos as a resilient and attractive addition to your indoor plant collection.
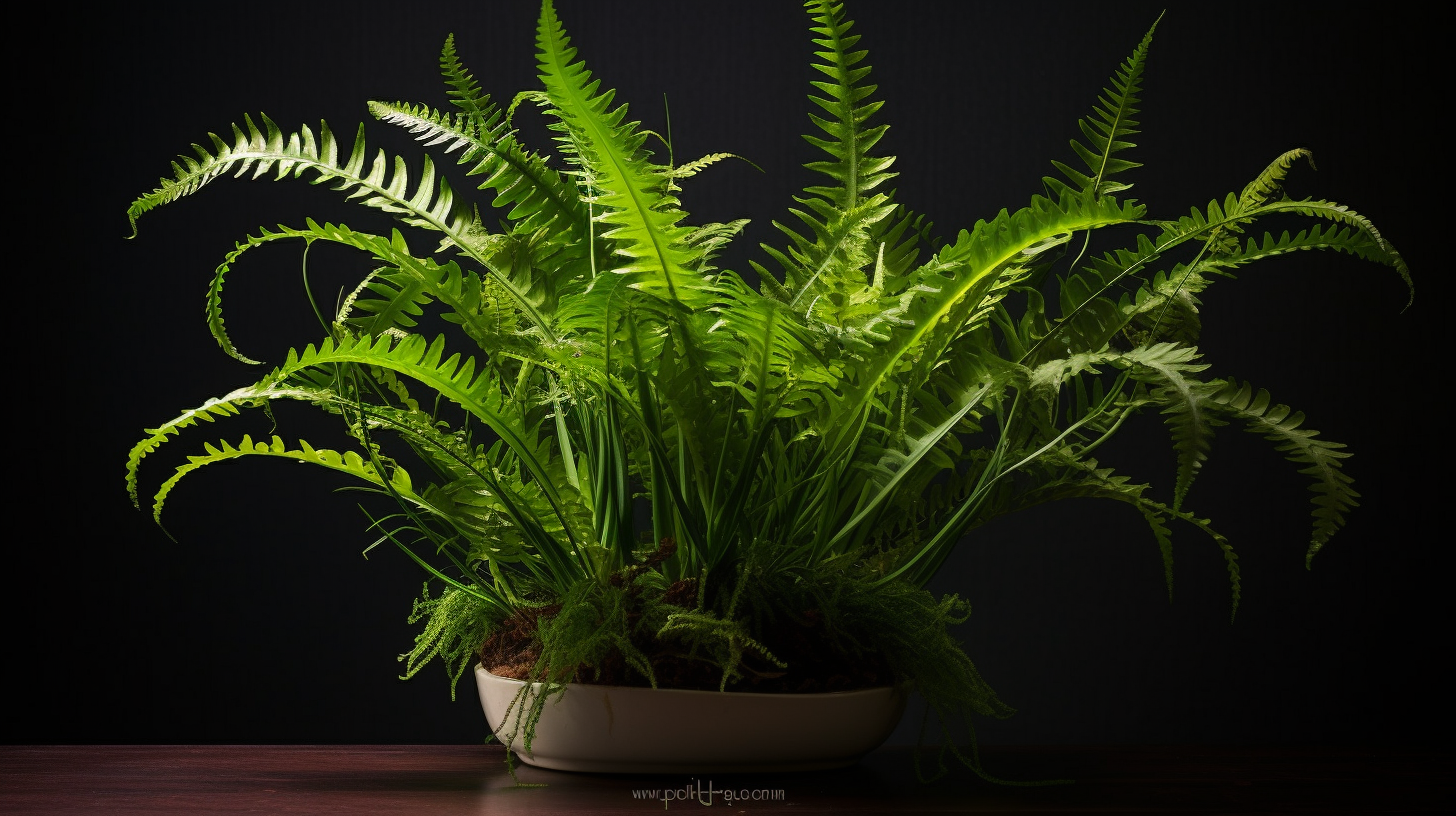
Kangaroo Fern

The Kangaroo Fern (Microsorum diversifolium), charming fronds resembling kangaroo paws, is an excellent indoor plant celebrated for its lush foliage and low-maintenance care. Here’s why it’s a great choice and tips on its care:

Benefits of Kangaroo Fern:

  • Aesthetic Appeal: The Kangaroo Fern’s distinctive, finely cut fronds add a touch of elegance to indoor spaces, creating a visually appealing, textured display.
  • Low Light Tolerance: This fern is well-suited for low-light conditions, making it a versatile option for areas with limited natural light.
  • Adaptability: The Kangaroo Fern is adaptable to various indoor environments, making it suitable for both beginners and experienced plant enthusiasts.

Light Requirements:

The Kangaroo Fern thrives in low to moderate light conditions. While it can tolerate low light, providing indirect sunlight enhances its growth. Avoid exposing it to direct sunlight for extended periods, which can scorch the leaves.

Care Tips:

  • Watering: Keep the soil consistently moist but not waterlogged. Allow the top inch of soil to dry out before watering. Kangaroo Ferns appreciate higher humidity, so misting the leaves can be beneficial.
  • Soil: Use a well-draining potting mix rich in organic matter, such as peat or coconut coir, to create a moisture-retentive environment.
  • Container: Choose a pot with drainage holes to prevent waterlogging. Ensure the container is proportionate to the size of the fern.
  • Temperature and Humidity: Kangaroo Ferns prefer average room temperatures and higher humidity levels. Protect them from drafts and extreme temperature fluctuations.
  • Fertilizing: Feed the Kangaroo Fern with a balanced, diluted liquid fertilizer during the growing season (spring and summer) every 4-6 weeks. Reduce or eliminate fertilization during the fall and winter.
  • Pruning: Trim any yellow or damaged fronds to maintain the plant’s appearance and encourage healthy growth.

The Kangaroo Fern is an excellent indoor plant, prized for its aesthetic appeal and ability to adapt to low-light conditions. This fern can thrive adequately, adding a touch of greenery to your indoor oasis.
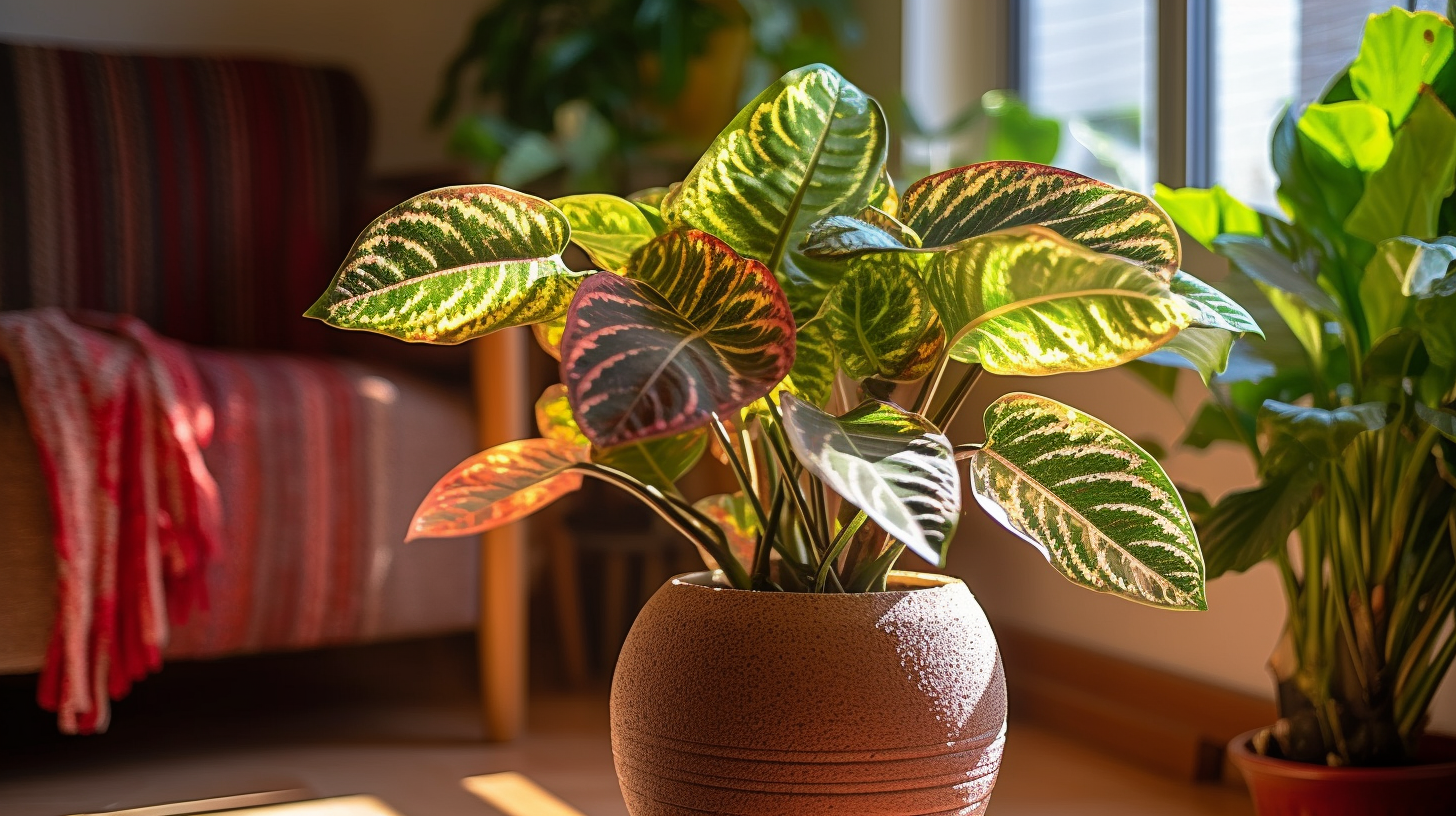
Red Prayer Plant

The Red Prayer Plant (Maranta leuconeura), known for its vibrant foliage and unique leaf movements, is a fantastic indoor plant with several appealing qualities. Here’s why it’s a great choice and tips on its care:

Benefits of Red Prayer Plant:

  • Striking Foliage: The Red Prayer Plant’s leaves are colorful and intricately patterned, making it a visually captivating addition to indoor spaces.
  • Leaf Movement: This plant exhibits a fascinating behavior known as “nyctinasty,” its leaves fold upward in the evening, resembling praying hands, and unfold during the day, adding an interactive element to its charm.
  • Adaptability: The Red Prayer Plant is adaptable to indoor conditions, making it suitable for various settings, from homes to offices.

Light Requirements:

The Red Prayer Plant thrives in medium to bright, indirect light. While it can tolerate lower light levels, providing indirect sunlight enhances its growth and promotes vibrant leaf colors. Direct sunlight should be avoided, as it can scorch the leaves.

Care Tips:

  • Watering: Keep the soil consistently moist but not waterlogged. The Red Prayer Plant prefers slightly higher humidity levels, so misting the leaves or placing a tray of water nearby can be beneficial.
  • Soil: Use a well-draining potting mix with added organic matter to retain moisture. A mix designed for tropical plants or a peat-based blend is suitable.
  • Container: Choose a pot with drainage holes to prevent water accumulation at the roots. Ensure the pot size is proportionate to the plant’s size.
  • Temperature and Humidity: Maintaining average room temperatures and higher humidity levels for optimal growth. Also, protect the plant from drafts and sudden temperature fluctuations.
  • Fertilizing: Feed the Red Prayer Plant with a balanced, diluted liquid fertilizer every 4-6 weeks during the growing season (spring and summer). Reduce or eliminate fertilization in the fall and winter.
  • Pruning: Trim any yellow or damaged leaves to maintain the plant’s appearance. Regular pruning encourages bushier growth.
  • Propagation: Red Prayer Plants can be propagated through division or stem cuttings. Propagate during the growing season for the best results.

In summary, the Red Prayer Plant is an excellent indoor choice. It offers visual appeal and engaging leaf movement that captivates plant enthusiasts. This plant can flourish with proper care, adding a touch of color and vibrancy to your indoor environment.


Areca Palm

The Areca Palm (Dypsis lutescens), commonly known as the Butterfly Palm or Golden Cane Palm, is a popular indoor plant cherished for its graceful fronds and air-purifying properties. Here’s why it’s a great choice and tips on its care:

Benefits of Areca Palm:

  • Aesthetic Appeal: With its feathery, arching fronds, the Areca Palm adds a touch of tropical elegance to indoor spaces, creating a lush and vibrant atmosphere.
  • Air Purification: The areca palm is recognized for its ability to remove indoor air pollutants such as formaldehyde, benzene, and trichloroethylene, contributing to improved air quality.
  • Low Maintenance: This palm species is relatively low-maintenance, making it suitable for seasoned plant enthusiasts and those new to indoor gardening.

Light Requirements:

The Areca Palm thrives in bright, indirect light. While it can tolerate lower light levels, ample indirect sunlight enhances its growth and maintains the plant’s health. Direct sunlight should be avoided, as it can scorch the fronds.

Care Tips:

  • Watering: Keep the soil consistently moist but not waterlogged. Allow the top inch of the soil to dry out before watering again. Avoid overwatering, as this can lead to root rot.
  • Soil: Use a well-draining potting mix with added perlite or sand to ensure good drainage. A mix designed for palms or tropical plants is suitable.
  • Container: Choose a pot with drainage holes to prevent water accumulation. Ensure the pot size is proportionate to the plant’s size.
  • Temperature and Humidity: Areca Palms thrive in warm, humid conditions. Maintain average room temperatures and consider increasing humidity levels by misting the fronds or using a humidifier.
  • Fertilizing: Feed the Areca Palm with a balanced, diluted liquid fertilizer every 4-6 weeks during the growing season (spring and summer). Reduce or eliminate fertilization in the fall and winter.
  • Pruning: Trim any yellow or damaged fronds using clean, sharp scissors. Regular pruning helps maintain the plant’s appearance and encourages healthy growth.

In summary, the Areca Palm is a beautiful indoor plant, valued for its aesthetic appeal and its air-purifying qualities. With proper care, this palm can thrive, transforming your indoor space into a tropical haven of greenery.
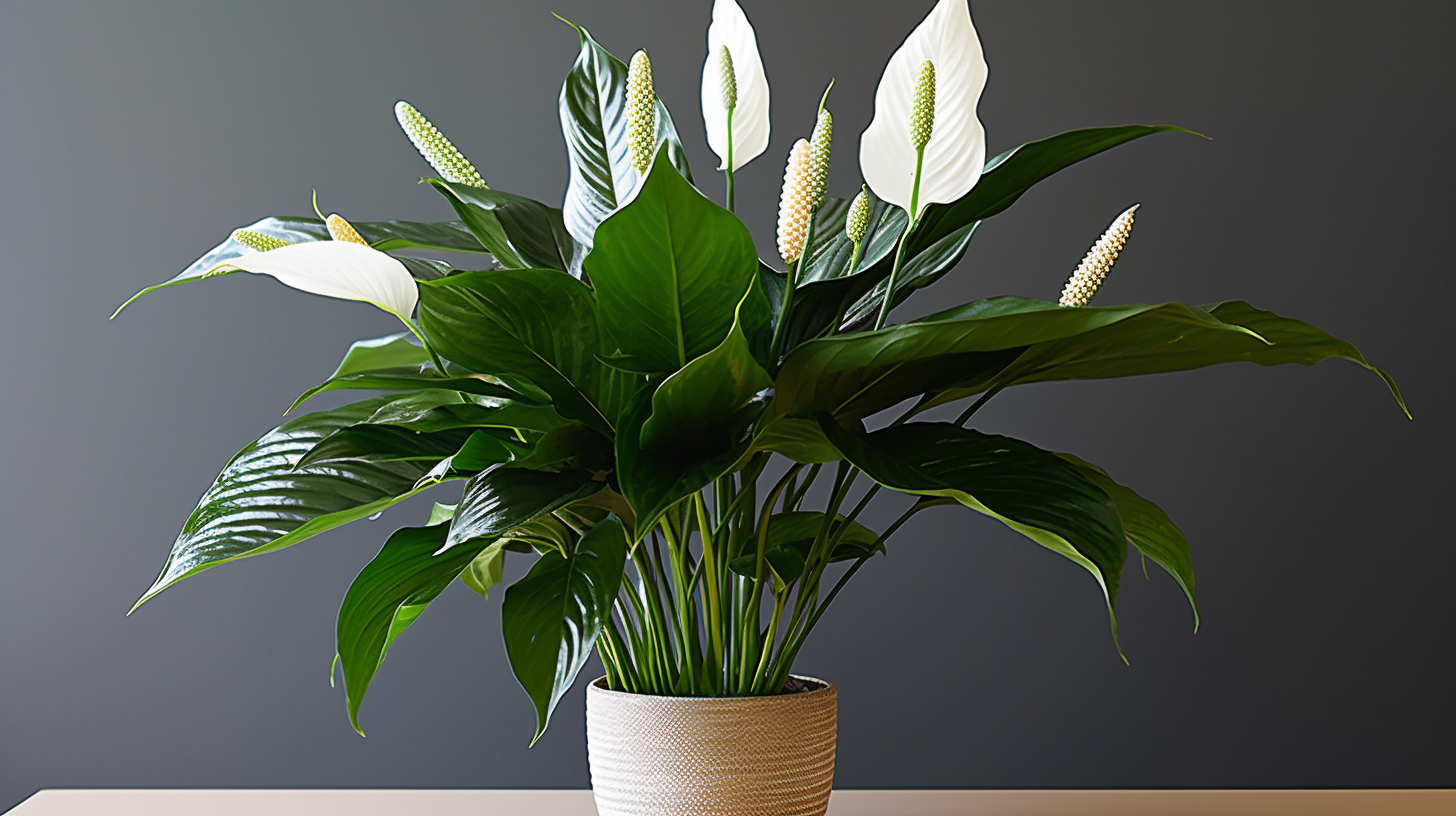
Peace Lily

The Peace Lily (Spathiphyllum) is a popular and versatile indoor plant celebrated for its elegant white blooms and air-purifying capabilities. Here’s why it’s a great choice and tips on its care:

Benefits of Peace Lily:

  • Graceful Blooms: The Peace Lily produces distinctive white flowers, called spathes, that gracefully rise above the dark green foliage, creating a striking contrast and adding a touch of sophistication to indoor spaces.
  • Air Purification: The Peace Lily is renowned for its ability to filter indoor air pollutants such as benzene, formaldehyde, and trichloroethylene, contributing to improved air quality.
  • Adaptability: This plant is adaptable to various indoor conditions, making it suitable for multiple settings, from homes to offices.

Light Requirements:

Peace Lilies thrive in low to medium light conditions. While they can tolerate lower light levels, providing them with some indirect sunlight enhances their blooming potential. Avoid placing them in direct sunlight, as this can scorch the leaves.

Care Tips:

  • Watering: Keep the soil consistently moist but not soggy. Peace Lilies are sensitive to overwatering, so allow the top inch of the soil to dry out before watering again. Drooping leaves indicate that the plant needs water.
  • Soil: Use a well-draining potting mix rich in organic matter. A mix designed for peace lilies or general-purpose indoor plants is suitable.
  • Container: Choose a pot with drainage holes to prevent waterlogged conditions. Ensure the pot size is appropriate for the plant’s size.
  • Temperature and Humidity: Peace Lilies prefer average room temperatures and higher humidity levels. While they can tolerate lower humidity, misting the leaves or placing a tray of water nearby can help increase humidity.
  • Fertilizing: Feed the Peace Lily with a balanced, diluted liquid fertilizer every 6-8 weeks during the growing season (spring and summer). Reduce or eliminate fertilization in the fall and winter.
  • Pruning: Trim any yellow or damaged leaves to maintain the plant’s appearance. Remove spent flowers to encourage continuous blooming.
  • Repotting: Peace Lilies may benefit from repotting every 1-2 years or when they outgrow their current container.

The Peace Lily is an excellent indoor plant known for its beauty and air-purifying qualities. This elegant plant can thrive with proper care, bringing visual appeal and health benefits to your indoor environment.
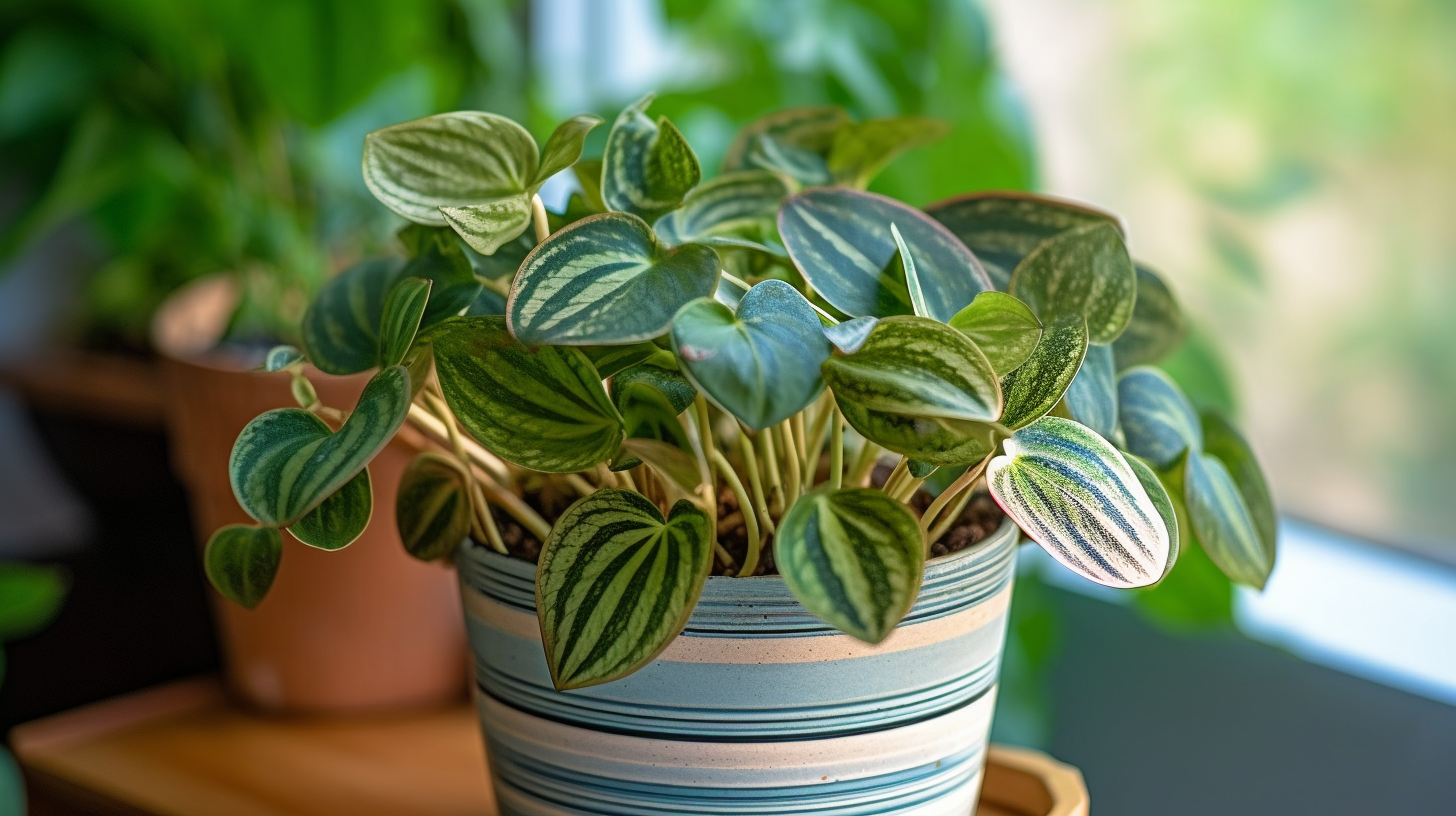
Peperomia

Peperomia is a popular indoor plant cherished for its diverse foliage and easy-care nature. Here’s why it’s a great choice and tips on its care:

Benefits of Peperomia:

  • Variety of Foliage: Peperomias come in various leaf shapes, colors, and textures, making them a visually interesting and diverse addition to indoor spaces.
  • Compact Size: With their compact growth habit, Peperomias are suitable for small spaces, making them ideal for apartments, offices, or desktop plants.
  • Low Maintenance: Peperomias are known for their low maintenance requirements. They are forgiving of occasional neglect and well-suited for beginners and experienced plant enthusiasts.

Light Requirements:

Peperomias thrive in medium to bright, indirect light. They can tolerate lower light conditions, but providing them with some indirect sunlight promotes healthier growth and vibrant foliage colors. Avoid exposing them to direct sunlight, which can scorch the leaves.

Care Tips:

  • Watering: Allow the top inch of the soil to dry out before watering. Peperomias prefer slightly moist soil but are susceptible to root rot if overwatered. Adjust the watering frequency based on the specific variety of Peperomia and environmental conditions.
  • Soil: Use a well-draining, lightweight potting mix. A mix designed for succulents or a combination of peat moss and perlite is suitable.
  • Container: Choose a pot with drainage holes to prevent waterlogging. Ensure the pot size is proportionate to the plant’s size.
  • Temperature and Humidity: Peperomias thrive in average room temperatures and adapt well to normal humidity levels. Protect them from drafts and sudden temperature fluctuations.
  • Fertilizing: Feed the Peperomia with a balanced, diluted liquid fertilizer every 6-8 weeks during the growing season (spring and summer). Reduce or eliminate fertilization in the fall and winter.
  • Pruning: Trim any leggy or damaged stems to maintain the plant’s compact shape. Pinching back the tips can encourage bushier growth.
  • Propagation: Peperomias are easily propagated through leaf or stem cuttings. Propagate during the growing season for the best results.

Peperomia is a versatile and charming indoor plant, valued for its unique foliage and undemanding care requirements. With proper attention to light, water, and soil conditions, Peperomias can thrive and bring a touch of greenery to your indoor environment.
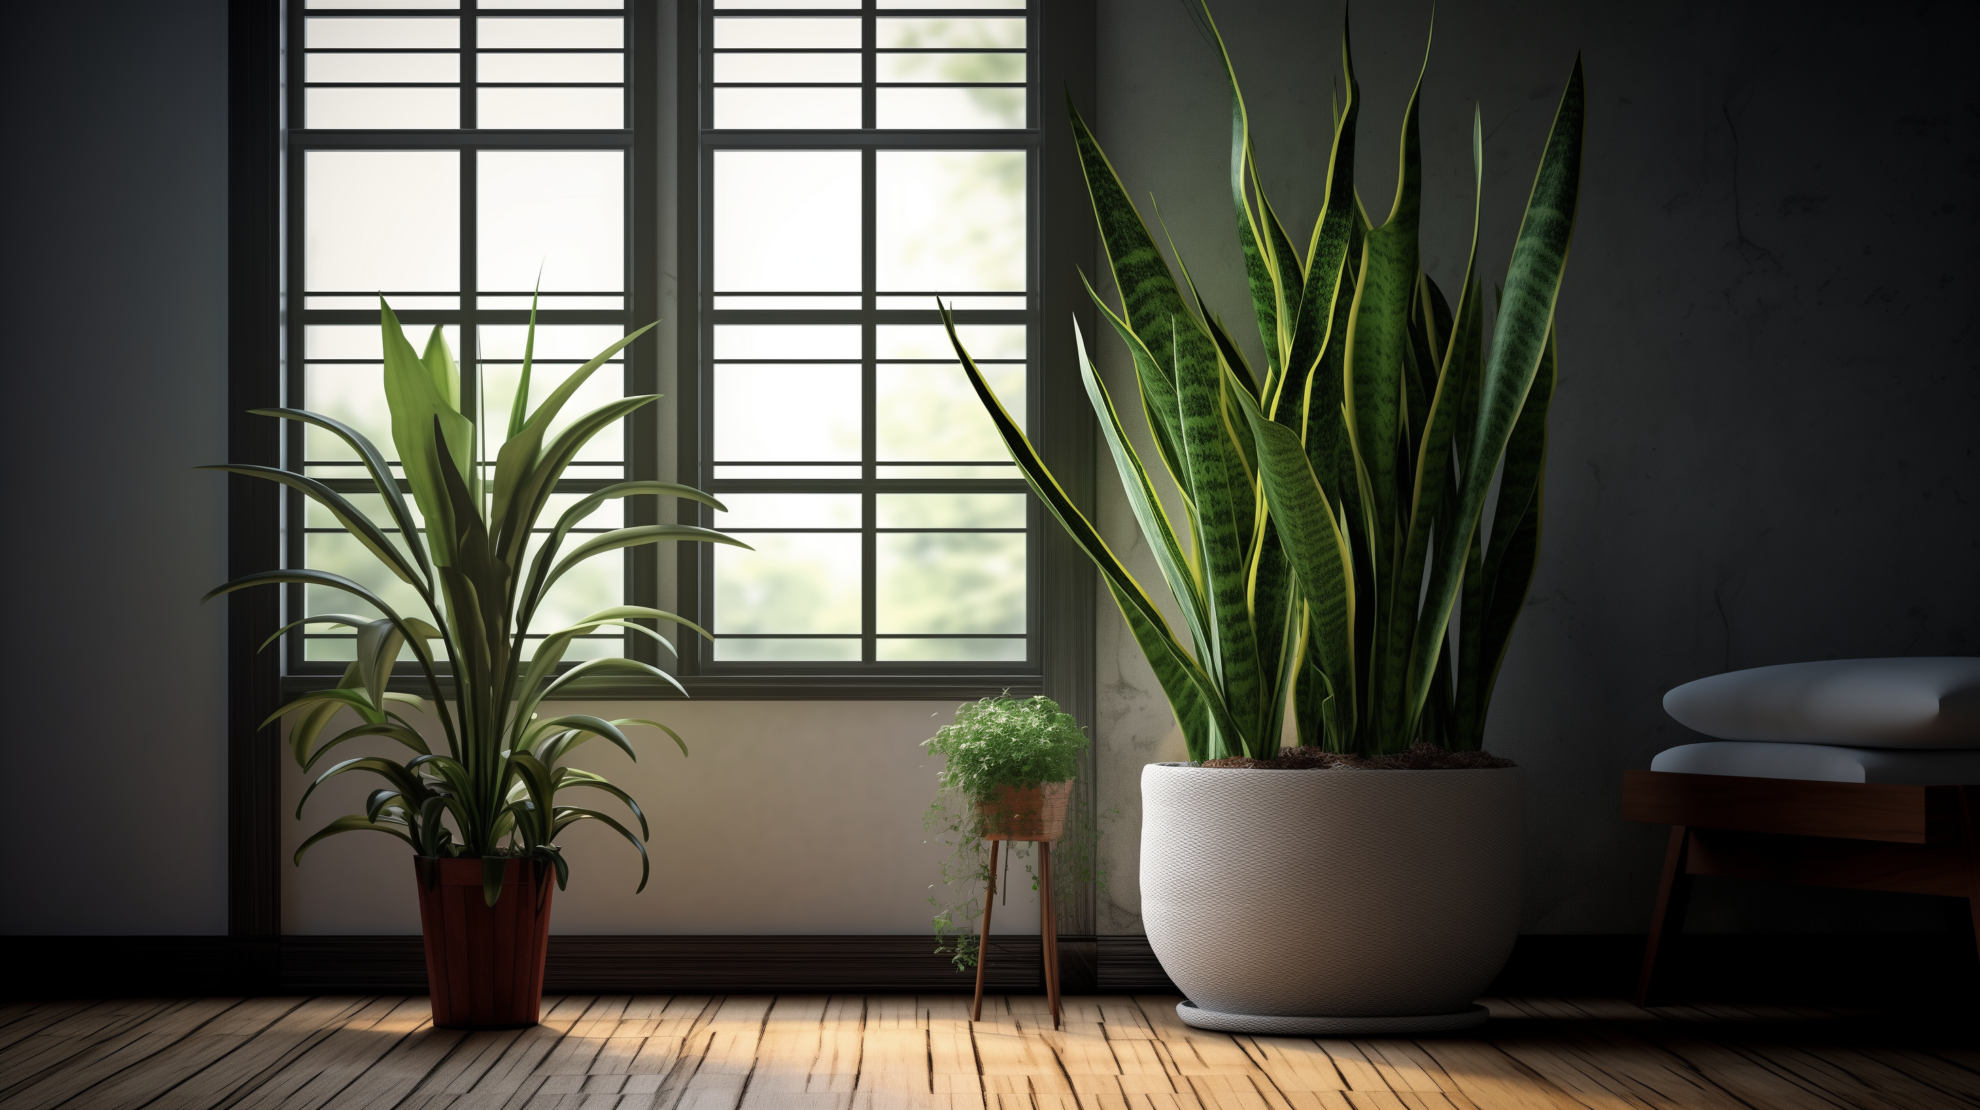
Snake Plant

The Snake Plant (Sansevieria), also known as Mother-in-law’s Tongue, is a popular indoor plant renowned for its resilience, air-purifying properties, and minimal care requirements. Here’s why it’s a great choice and tips on its care:

Benefits of Snake Plant:

  • Air Purification: The Snake Plant is highly effective at removing indoor air pollutants, such as benzene, formaldehyde, trichloroethylene, and nitrogen oxide, improving indoor air quality.
  • Low Maintenance: The snake plant is an excellent choice for beginners to indoor gardening or individuals with busy lifestyles. It is known for its hardiness and ability to tolerate neglect.
  • Adaptability: Snake Plants are adaptable to various indoor conditions, including low light levels, making them suitable for different environments.

Light Requirements:

The Snake Plant can thrive in various light conditions, from low to bright, indirect light. While it can tolerate lower light levels, providing it with some indirect sunlight enhances its growth and maintains the vibrancy of its foliage. It is highly tolerant of low-light conditions, making it suitable for areas with limited natural light.

Care Tips:

  • Watering: Allow the soil to dry out between waterings. Snake Plants are drought-tolerant and prefer slightly dry conditions. Overwatering can lead to root rot, so avoiding waterlogged soil is crucial.
  • Soil: To prevent water retention, use a well-draining potting mix, such as a cactus or succulent mix. Snake Plants are adaptable to various soil types.
  • Container: Choose a pot with drainage holes to facilitate proper drainage. Snake Plants are resilient and can thrive in various pot sizes.
  • Temperature and Humidity: Snake Plants are adaptable to various temperatures and humidity levels. They can tolerate average room temperatures and normal indoor humidity.
  • Fertilizing: Feed the Snake Plant sparingly with a balanced, diluted liquid fertilizer every 6-8 weeks during the growing season (spring and summer). Reduce or eliminate fertilization in the fall and winter.
  • Pruning: Trim any yellow or damaged leaves close to the soil level. Snake Plants are slow growers and generally do not require extensive pruning.
  • Propagation: Snake Plants can be propagated through division or leaf cuttings. Propagate during the growing season for optimal results.

The Snake Plant is an outstanding indoor plant celebrated for its resilience, air-purifying capabilities, and adaptability to various light conditions. This hardy plant can thrive with minimal care and bring visual appeal and health benefits to your indoor space.
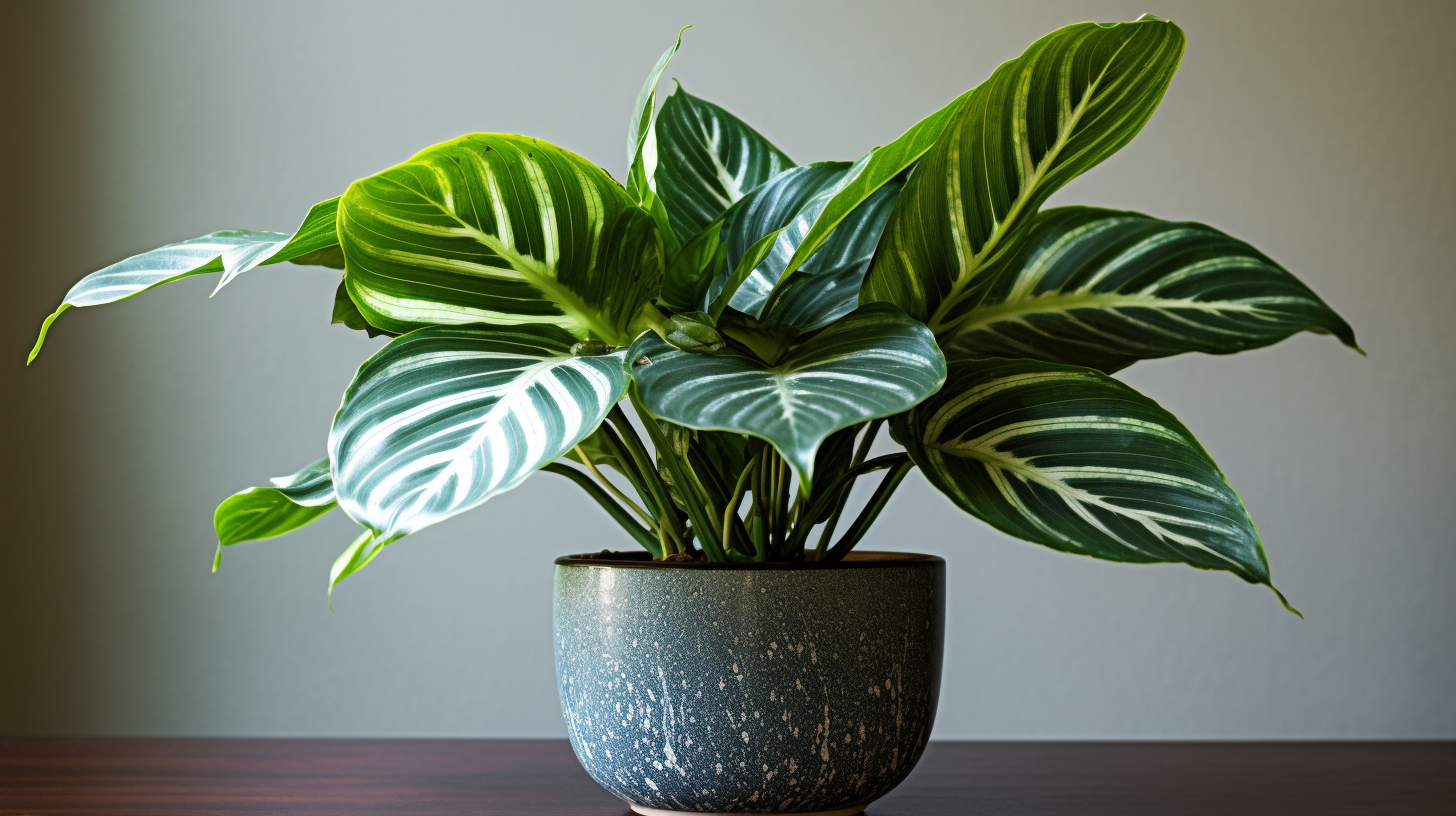
Peacock Plant

The Peacock Plant, scientifically known as Calathea makoyana, is a captivating indoor plant cherished for its stunning foliage and unique characteristics. Here’s why it’s a great choice and tips on its care:

Benefits of Peacock Plant:

  • Striking Foliage: The Peacock Plant’s leaves are intricately patterned and vibrantly mixed green hues, resembling the beautiful plumage of a peacock. Thus, it is a visually stunning addition to indoor spaces.
  • Air Purification: Like many houseplants, the Peacock Plant contributes to improved indoor air quality by helping filter and cleanse the air of pollutants.
  • Interactive Leaves: The Peacock Plant’s leaves exhibit a fascinating behavior known as “nyctinasty,” where they open in the morning and close in the evening. This adds an interactive and dynamic element to the plant’s appeal.

Light Requirements:

The Peacock Plant thrives in medium to bright, indirect light. While it can tolerate lower light conditions, providing it with some indirect sunlight enhances its growth and maintains the vibrancy of its foliage. Direct sunlight should be avoided, as it can scorch the leaves.

Care Tips:

  • Watering: Keep the soil consistently moist but not waterlogged. The Peacock Plant prefers slightly higher humidity levels, so misting the leaves or placing a tray of water nearby can be beneficial.
  • Soil: Use a well-draining potting mix rich in organic matter. A mix designed for tropical plants or combining peat moss and perlite is suitable.
  • Container: Choose a pot with drainage holes to prevent water accumulation. Ensure the pot size is proportionate to the plant’s size.
  • Temperature and Humidity: The Peacock Plant thrives in warm, humid conditions. Maintain average room temperatures and consider increasing humidity levels by misting the leaves or using a humidifier.
  • Fertilizing: Feed the Peacock Plant with a balanced, diluted liquid fertilizer every 4-6 weeks during the growing season (spring and summer). Reduce or eliminate fertilization in the fall and winter.
  • Pruning: Trim any yellow or damaged leaves close to the soil level. Regular pruning helps maintain the plant’s appearance and encourages healthy growth.
  • Protect from Drafts: The Peacock Plant is sensitive to drafts, so protecting it from sudden temperature changes or breezy conditions is essential.

The Peacock Plant is an excellent indoor choice, admired for its exquisite foliage and unique characteristics. This tropical beauty can thrive with proper care, bringing a touch of elegance and dynamism to your indoor environment.
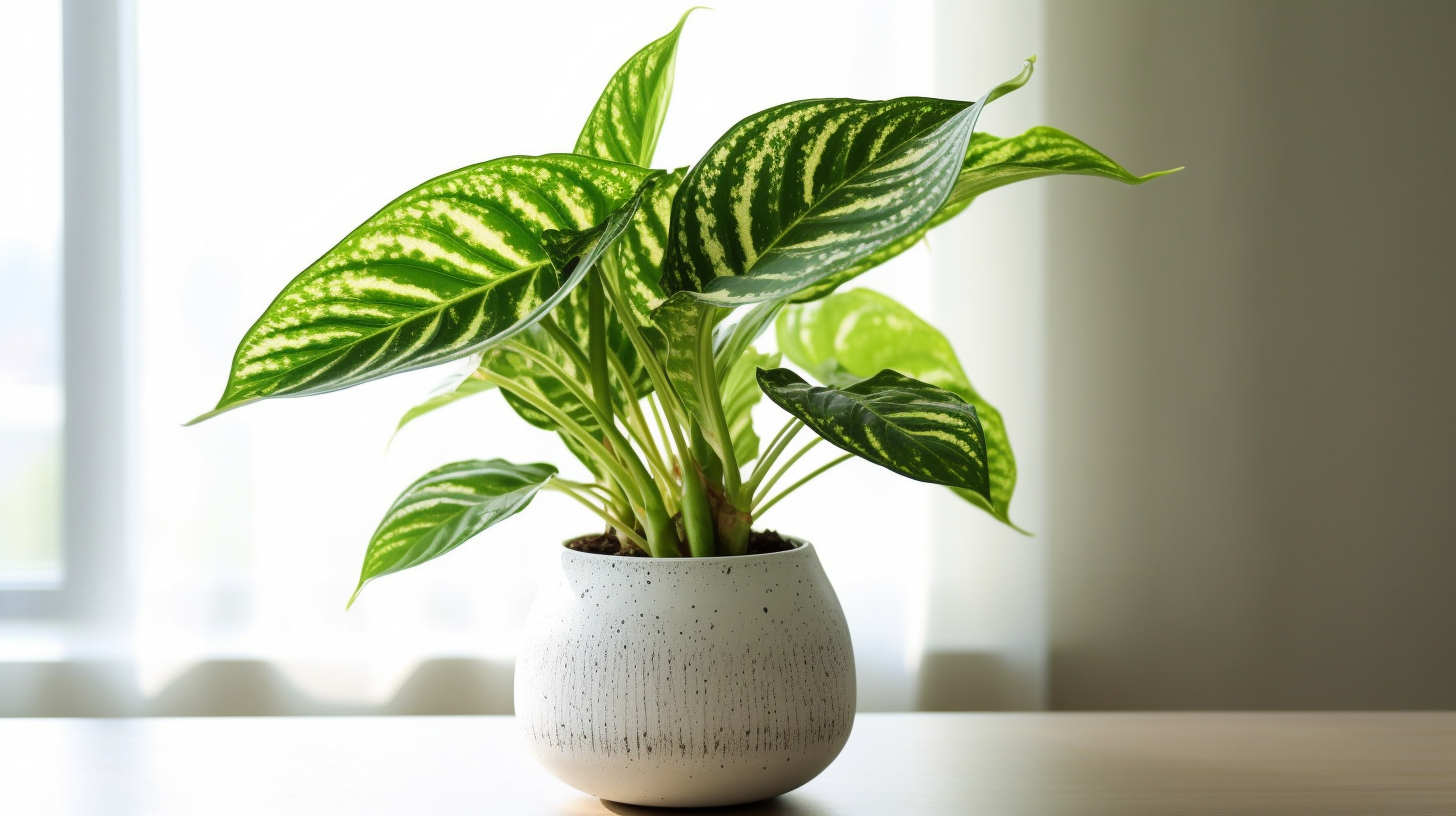
Dumb Cane

The Dumb Cane plant, scientifically known as Dieffenbachia, is a popular indoor plant appreciated for its attractive foliage and ease of care. Here’s why it’s a great choice and tips on its care:

Benefits of Dumb Cane:

  • Bold Foliage: Dumb Cane boasts large, bold leaves with distinctive patterns, making it a visually appealing and decorative addition to indoor spaces.
  • Air Purification: Like many houseplants, Dumb Cane contributes to improved indoor air quality by filtering and removing common pollutants.
  • Adaptability: Dumb Cane is adaptable to various indoor conditions, making it suitable for different environments and skill levels of plant enthusiasts.

Light Requirements:

Dumb Cane thrives in medium to bright, indirect light. While it can tolerate lower light conditions, providing it with some indirect sunlight enhances its growth and maintains the vibrancy of its foliage. Avoid exposing it to direct sunlight for extended periods, which can scorch the leaves.

Care Tips:

  • Watering: Keep the soil consistently moist but not waterlogged. Allow the top inch of the soil to dry out between waterings. Dumb Cane prefers slightly higher humidity levels, so misting the leaves or placing a tray of water nearby can be beneficial.
  • Soil: Use a well-draining potting mix with added organic matter. A mix designed for tropical plants or combining peat moss and perlite is suitable.
  • Container: Choose a pot with drainage holes to prevent water accumulation. Ensure the pot size is proportionate to the plant’s size.
  • Temperature and Humidity: Dumb Cane thrives in warm, humid conditions. Maintain average room temperatures and consider increasing humidity levels by misting the leaves or using a humidifier.
  • Fertilizing: Feed the Dumb Cane with a balanced, diluted liquid fertilizer every 4-6 weeks during the growing season (spring and summer). Reduce or eliminate fertilization in the fall and winter.
  • Pruning: Trim any yellow or damaged leaves close to the soil level. Regular pruning helps maintain the plant’s appearance and encourages healthy growth.
  • Toxicity: Be aware that Dumb Cane sap can cause skin irritation and is toxic if ingested. Keep it out of reach of pets and children.

The Dumb Cane is a fantastic indoor plant known for its bold foliage and adaptability. With proper care, this tropical beauty can thrive, adding a touch of sophistication to your indoor environment.

Dragon Tree

The Dragon Tree, scientifically known as Dracaena marginata, is a popular indoor plant valued for its sleek appearance, air-purifying qualities, and ease of care. Here’s why it’s a great choice and tips on its care:

Benefits of Dragon Tree:

  • Architectural Appeal: The Dragon Tree features slender, upright stems with tufts of long, arching leaves, creating a distinctive architectural presence that enhances the aesthetic of indoor spaces.
  • Air Purification: Like many Dracaena species, the Dragon Tree contributes to improved indoor air quality by filtering and removing common pollutants, including formaldehyde and benzene.
  • Adaptability: Dragon Trees are adaptable to various indoor conditions, making them suitable for different environments and plant enthusiasts’ skill levels.

Light Requirements:

The Dragon Tree thrives in medium to bright, indirect light. While it can tolerate lower light conditions, providing it with some indirect sunlight enhances its growth and maintains the vibrancy of its foliage. Avoid exposing it to direct sunlight for extended periods, which can scorch the leaves.

Care Tips:

  • Watering: Allow the top inch of the soil to dry out between waterings. Dragon Trees prefer slightly drier conditions and are susceptible to root rot if overwatered. Adjust the watering frequency based on the specific environmental conditions.
  • Soil: Use a well-draining potting mix with added perlite or sand to ensure good drainage. A mix designed for tropical plants or combining peat moss and perlite is suitable.
  • Container: Choose a pot with drainage holes to prevent water accumulation. Ensure the pot size is proportionate to the plant’s size.
  • Temperature and Humidity: Dragon Trees thrive in average room temperatures and adapt well to normal indoor humidity levels. Protect them from drafts and sudden temperature fluctuations.
  • Fertilizing: Feed the Dragon Tree with a balanced, diluted liquid fertilizer every 4-6 weeks during the growing season (spring and summer). Reduce or eliminate fertilization in the fall and winter.
  • Pruning: Trim any yellow or damaged leaves close to the stem to maintain the plant’s appearance. Regular pruning can help shape the plant and encourage healthy growth.

In summary, the Dragon Tree is an excellent indoor plant known for its sleek design and adaptability. With proper care, this stylish air-purifying plant can thrive, adding a touch of sophistication to your home or office.

The Ultimate Guide to Low-Light Indoor Plants for a Lush Home

In the quest for a vibrant and low-maintenance indoor garden, our guide to low-light houseplants offers a treasure trove of options for plant enthusiasts. From the resilient Snake Plant to the visually captivating Peacock Plant, these green companions are perfect for those with busy schedules, dim living spaces, or a penchant for travel. Embracing the ongoing science experiment that is houseplant care, we’ve highlighted 13 low-light plants that defy the myth of needing “zero” sunlight.

Discover the beauty of Lucky Bamboo, the air-purifying qualities of Peace Lily, and the striking foliage of the Red Prayer Plant—all thriving with minimal sunlight. Unravel the benefits of low-light plants, such as their air-purifying capabilities and low maintenance, creating a lush and inviting atmosphere within your home.

While sharing insights into common mistakes and essential care tips, we’ve empowered even the self-proclaimed “houseplant serial killers” to foster thriving greenery. From watering techniques to choosing the suitable soil and container, this guide equips you with the knowledge to cultivate a successful indoor garden.

As summer approaches, there’s no better time to bring the beauty of the outdoors to your backyard. Paradise Landscape and Hardscapes in Annapolis, MD, is your go-to partner for transforming your outdoor space. Whether you dream of a tranquil garden oasis or envision a stunning pavers patio, now is the perfect moment to turn those dreams into reality.

Contact Paradise Landscape and Hardscapes today and embark on a journey to create your own slice of paradise right at home! Summer is on the horizon—let’s make it extraordinary.

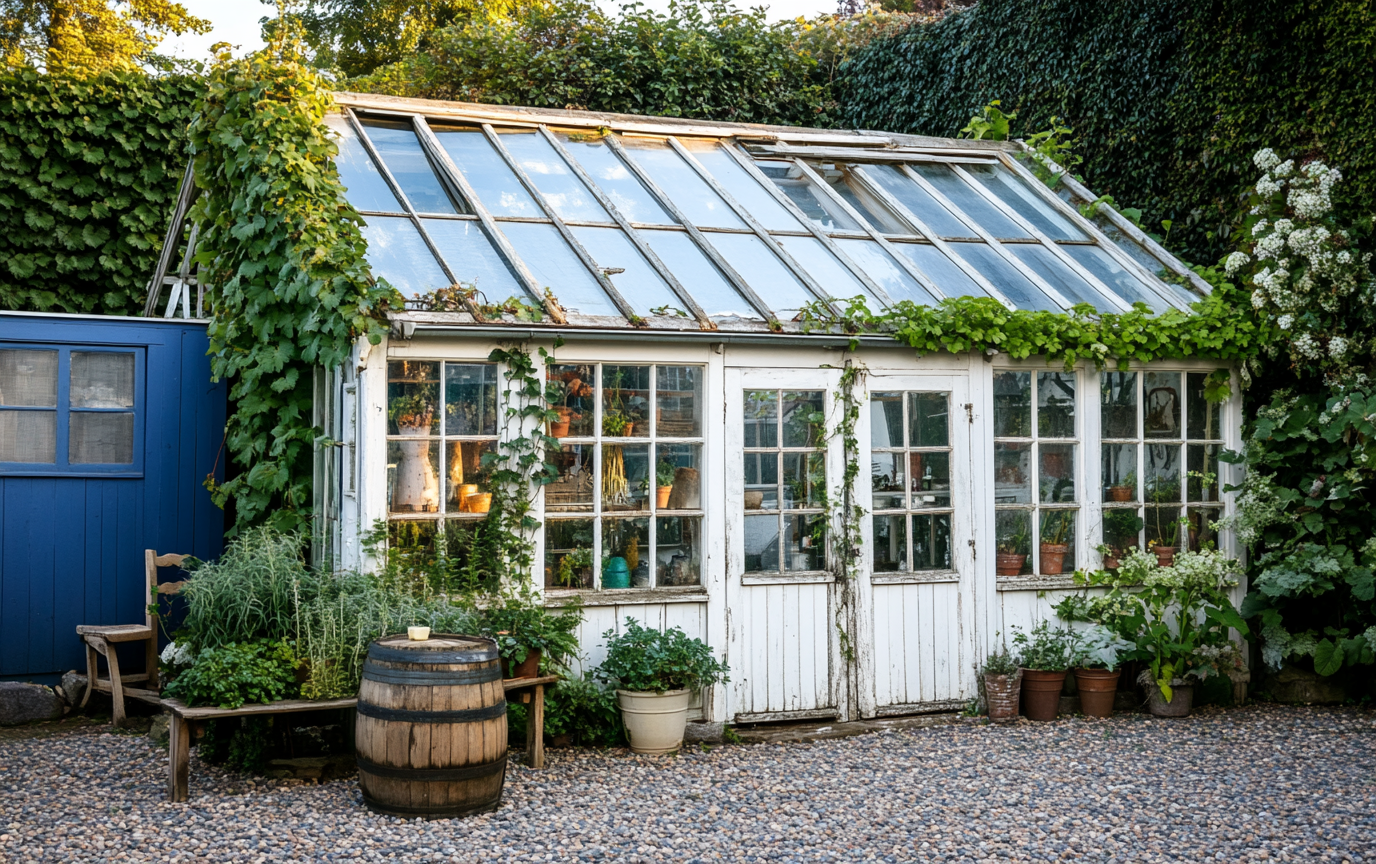
FREE Estimate
Aloha! Paradise Landscape and Hardscapes is your premier lawn care and hardscaping company in Annapolis, MD. At Paradise Landscape and Hardscapes, we pride ourselves on being the authority to transform outdoor spaces into havens of natural beauty and functionality. As the #1 go-to for lawn care and hardscaping in Annapolis and the surrounding areas, we are committed to enhancing the beauty and usability of your property. This landscaping article will discuss 15 Mosquito Repellent Plants and how to create a sanctuary without bites! Or, at least, fewer bites!

Imagine lounging in your backyard oasis, surrounded by lush greenery that adds charm and acts as a natural shield against mosquitoes.

Our Paradise Landscape and Hardscapes team believes in the power of integrating purposeful landscaping elements, and these mosquito-repelling plants are your ticket to an insect-free haven. We also understand the importance of creating visually stunning landscapes and sanctuaries free from the nuisance of mosquitoes. In this latest blog, “15 Mosquito Repellent Plants,” we delve into the world of nature’s defense against these pesky insects.

Imagine lounging in your backyard oasis, surrounded by lush greenery that adds charm and acts as a natural shield against mosquitoes. Our Paradise Landscape and Hardscapes team believes in the power of integrating purposeful landscaping elements, and these mosquito-repelling plants are your ticket to an insect-free haven.

Discover the Power of Nature’s Repellents

From fragrant herbs to vibrant flowering varieties, each plant serves a dual purpose – adding aesthetic appeal to your landscape while actively deterring mosquitoes.

Let’s take a minute to learn about the science behind these natural repellents and how strategically incorporating them into your outdoor space can significantly impact them. At Paradise Landscape and Hardscapes, we believe in the synergy between landscaping aesthetics and practical functionality, and these mosquito-repelling plants exemplify that perfect balance.

A Glimpse into What Awaits You

  • Lavender: Not just a visual delight but also a scent mosquitoes detest.
  • Citronella: The classic mosquito-repelling hero with its refreshing aroma.
  • Basil: A culinary favorite that doubles as a mosquito deterrent.
  • Marigold: Vibrant blooms that add color while keeping mosquitoes at bay.

These plants can be grown in gardens to naturally repel mosquitoes, creating an unwelcoming environment for these insects. Here are 15 top plants and flowers that naturally repel mosquitoes, along with a brief description for each:

  • Rosemary: Its fragrance repels mosquitoes, and it can endure various climates.
  • Basil: The fragrant leaves of basil make it an effective mosquito repellent. It thrives in hot and humid climates.
  • Citronella/Scented Geranium: Known for its distinct smell, citronella grass is commonly used as a natural ingredient in mosquito repellents.
  • Bee Balm: This plant can be grown in areas where guests often gather, as it naturally repels mosquitoes.
  • Mint: An excellent nontoxic option for keeping mosquitoes, flies, and ants away. It grows well in sunny, bright locations with fertile, well-draining soil.
  • Floss Flower (Ageratum): It can repel mosquitoes and be grown to keep bugs away naturally.
  • Sage: Planting sage near a fire pit can help repel mosquitoes.
  • Allium: This plant can be grown for its colorful and fragrant display and its ability to keep uninvited bugs out.
  • Lavender: Its essential oils hinder a mosquito’s ability to smell, making it an effective mosquito repellent. It is tough, drought-resistant, and only needs full sun and good drainage.
  • Marigolds: The fragrance of marigolds repels mosquitoes and is also used in commercial insect repellents. They provide showy garden color and have strongly scented foliage.
  • Lemon Balm: This herb emits a citrusy aroma that repels mosquitoes, similar to the fragrant oils in citronella-scented products.
  • Lemon Grass (Citronella Grass): Known for its mosquito-repelling solid fragrance, it is the most commonly used natural ingredient in mosquito repellents.
  • Catnip: Found to be ten times more effective than DEET, the chemical used in most insect repellents.
  • Eucalyptus: Its oil is known to repel mosquitoes.
  • Garlic: When rubbed on the skin, it can act as a natural mosquito repellent.

How to use Lavender to Repel Mosquitoes

To use lavender to repel mosquitoes, you can follow these methods:

  • Growing Lavender Plants: Planting lavender in your yard or placing potted lavender plants on your patio can help repel mosquitoes. Lavender grows best in areas with lots of sunlight and well-drained soil.
  • Lavender Essential Oil Spray: You can make a lavender essential oil spray by combining 30-40 drops of lavender oil with 1.5 ounces of distilled water in a clean spray bottle. Somebody can use this spray can be used to repel mosquitoes by misting it in areas where you want to keep bugs away.
  • Lavender Oil and Water Mixture: Mix 10 drops of lavender oil with 100 ml of water to create a mosquito-repelling solution.
  • Lavender Oil Skin Application: You can also rub lavender essential oil mixed with a carrier oil on your skin to repel mosquitoes. A typical recipe includes 10-20 drops of lavender essential oil and 2 tablespoons of carrier oil.

It’s important to note that while lavender is highly effective at repelling mosquitoes, some sources suggest that it may not work for everyone. Testing these methods to see what works best for you is always a good idea.

What Month do Mosquitoes come out in Maryland?

Mosquito breeding in Maryland typically occurs from the vernal equinox and extends slightly past the autumnal equinox, with most springtime breeding occurring in woodlands and adjacent swamps. The first signs of summer, including the arrival of mosquitoes, are usually observed after the spring season. Mosquito activity can be influenced by topography, water regimes, soil types, and mean low temperature, leading to unique habitats for mosquito breeding across different state regions.

Additionally, the presence of mosquitoes in Maryland can be influenced by local factors such as humidity, standing water, and the specific mosquito species in the area. The state’s warm and humid climate can increase mosquito activity, especially near marshy or swampy areas. Certain mosquito species, such as the invasive Asian tiger mosquito, are known to be particularly aggressive and can thrive in the state’s wet and hot conditions.

Mosquitoes can still be active in Maryland during the fall months, and it is vital to be mindful of conditions in your yard that promote mosquito breeding, such as the accumulation of standing water. Preventive measures, such as routinely emptying standing water and using mosquito control services, can help reduce mosquito populations and minimize their impact.

In summary, seasonal and local factors influence mosquito activity in Maryland, with breeding typically occurring from spring to autumn. The state’s warm and humid climate and the presence of specific mosquito species can contribute to varying levels of mosquito activity across different regions of Maryland. Taking proactive steps to eliminate mosquito breeding sites and using preventive measures can help reduce mosquito populations and minimize their impact on the local community.

As the #1 go-to for lawn care and hardscaping in Annapolis and the surrounding areas, we are committed to enhancing the allure and usability of your property.

Stay Tuned for Landscaping Wisdom

At Paradise Landscape and Hardscapes, we’re not just a landscaping company; we’re your partners in creating outdoor environments that go beyond the ordinary. Are you ready to elevate your outdoor experience? Stay tuned for insightful tips, expert advice, and the latest trends in landscaping. Paradise Landscape and Hardscapes – where every blog is a step towards your dream outdoor space! Contact us today by filling out the short form below to get started on your lawn care project!

FREE Estimate