New Sod Care Guide for Annapolis Lawns
A lush, green lawn is the perfect complement to any home. Installing new sod gives you an instant transformation, but the work doesn’t stop there. Proper care during the first few weeks is essential for establishing a healthy, deeply rooted lawn that will thrive for years. As Annapolis’s local experts, Paradise Landscape and Hardscape is here to guide you through every step.
This guide provides a straightforward schedule for watering, mowing, and maintaining your new investment. We will cover the crucial first month and provide long-term tips to ensure your lawn stays beautiful. With our professional advice, you can protect your sod and cultivate the landscape of your dreams.
Day 1: Immediately After Installation
The first day sets the stage for success. Your primary focus should be on watering and minimizing stress on the new turf.
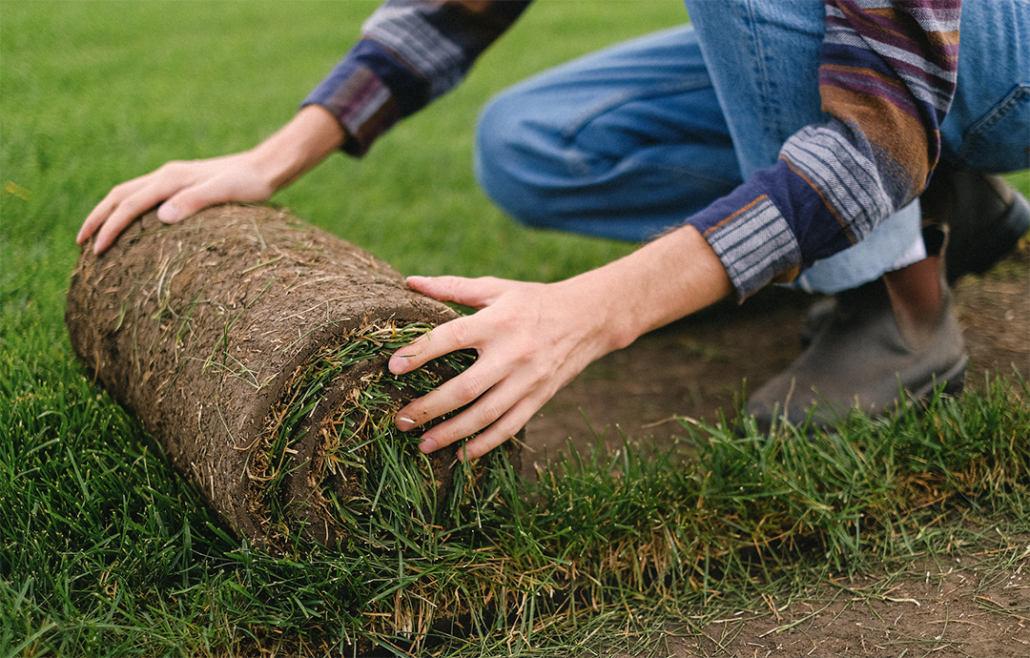
Water Thoroughly
As soon as your sod is laid, it needs a deep drink of water. Water the entire lawn for about 45 to 60 minutes. The goal is to moisten the soil 4 to 6 inches deep beneath the sod. This initial soaking helps the delicate roots make contact with the soil and prevents them from drying out.
To check if you’ve watered enough, gently lift a corner of a sod piece. The soil underneath should be damp to the touch. This is a critical first step for successful root development.
Keep Off the Grass
Your new lawn is extremely fragile. Avoid walking on it for at least two weeks, though a full month is ideal for the best results. Foot traffic, including from pets, can compact the soil and prevent the roots from anchoring properly. It can also create uneven spots or disrupt the seams between sod pieces.
Days 2-14: Encouraging Root Growth
The next two weeks are all about establishing a consistent routine that encourages the sod to take root.
Create a Watering Schedule
Inconsistent watering is the top reason new sod fails. For the first two weeks, you need to provide light, frequent watering. We recommend watering twice a day for 10-15 minutes each time. The best times are in the morning and late afternoon, avoiding the midday heat when evaporation is highest.
This schedule keeps the top layer of soil consistently moist without becoming waterlogged. A soggy lawn can lead to fungal diseases and poor root growth. Remember to adjust for any rainfall.
Check for Rooting
Around the one-week mark, you can start checking for root development. Gently tug on a small section of the grass. If you feel resistance, it means the roots are beginning to establish themselves in the soil below. By day 14, you should feel significant resistance, a clear sign that the sod is successfully bonding with your yard.
Weeks 3-4: The Establishment Phase
As your sod becomes more established, you can begin to transition to a more standard lawn care routine.
Adjust Your Watering
After day 14, it’s time to encourage deeper root growth. Gradually reduce your watering frequency to once every two or three days, but increase the duration. Instead of short, frequent cycles, give your lawn a single, deep soak for about an hour. This method forces the roots to grow deeper into the soil in search of moisture, creating a more resilient, drought-tolerant lawn.
Prepare for the First Mow
By the third week, your grass will likely be ready for its first mowing. Wait until the grass is about one-third taller than its recommended mowing height. For the most common Maryland grass types like tall fescue, this means letting it grow to about 4 inches before cutting it down to 3 inches.
Before you start, make sure your mower blades are sharp to ensure a clean cut that doesn’t damage the new grass. Never mow a wet lawn, as this can create ruts and cause grass clippings to clump. Also, follow the one-third rule: never remove more than one-third of the grass blade in a single mowing session.
When to Fertilize
Applying fertilizer too soon can burn the new roots. We advise our clients to wait at least 30 to 60 days before fertilizing new sod. This waiting period gives the root system enough time to develop and properly absorb the nutrients. A starter fertilizer tailored to your soil’s needs will provide the right nourishment for long-term health.
Long-Term Maintenance and Troubleshooting
Once your sod is established, you can shift to a long-term maintenance plan. However, a few common issues can arise.
Fixing Gaps and Brown Spots
Sometimes, small gaps may appear between sod pieces, or you might notice brown spots. Gaps can be filled with a thin layer of topsoil. Brown spots are often a sign of underwatering or uneven sprinkler coverage. Check the soil moisture in these areas and adjust your watering as needed to ensure the entire lawn receives even hydration.
A Full-Service Approach
Proper lawn care involves more than just watering and mowing. Services like core aeration, dethatching, and a consistent fertilization schedule are vital for maintaining a healthy landscape in Maryland. Managing weeds and pests is also a key part of keeping your lawn in top condition.
For homeowners in the Annapolis area, managing a new lawn can feel like a full-time job. Paradise Landscape and Hardscape offers comprehensive landscape services in Maryland, from initial sod installation to ongoing maintenance. We also specialize in hardscape solutions, helping you create beautiful and functional outdoor living spaces that complement your perfect lawn.
Partner with Annapolis’s Landscape Experts
Caring for new sod requires dedication, especially in the first month. By following this guide, you can give your lawn the best possible start.
If you want to ensure your investment thrives without the hassle, consider partnering with a professional. Paradise Landscape and Hardscape provides expert sod care in Annapolis and beyond. Contact us today for a consultation on our landscape and hardscape services, and let us help you achieve the beautiful, healthy lawn you deserve.


